[free_stencil_maker]
This guide is part of our Stencil Making Tools & Techniques series. If you want a walkthrough for one specific photo, see our companion guide on making a stencil from a photo step-by-step, or jump straight to converting an image to SVG for stencil cutting.
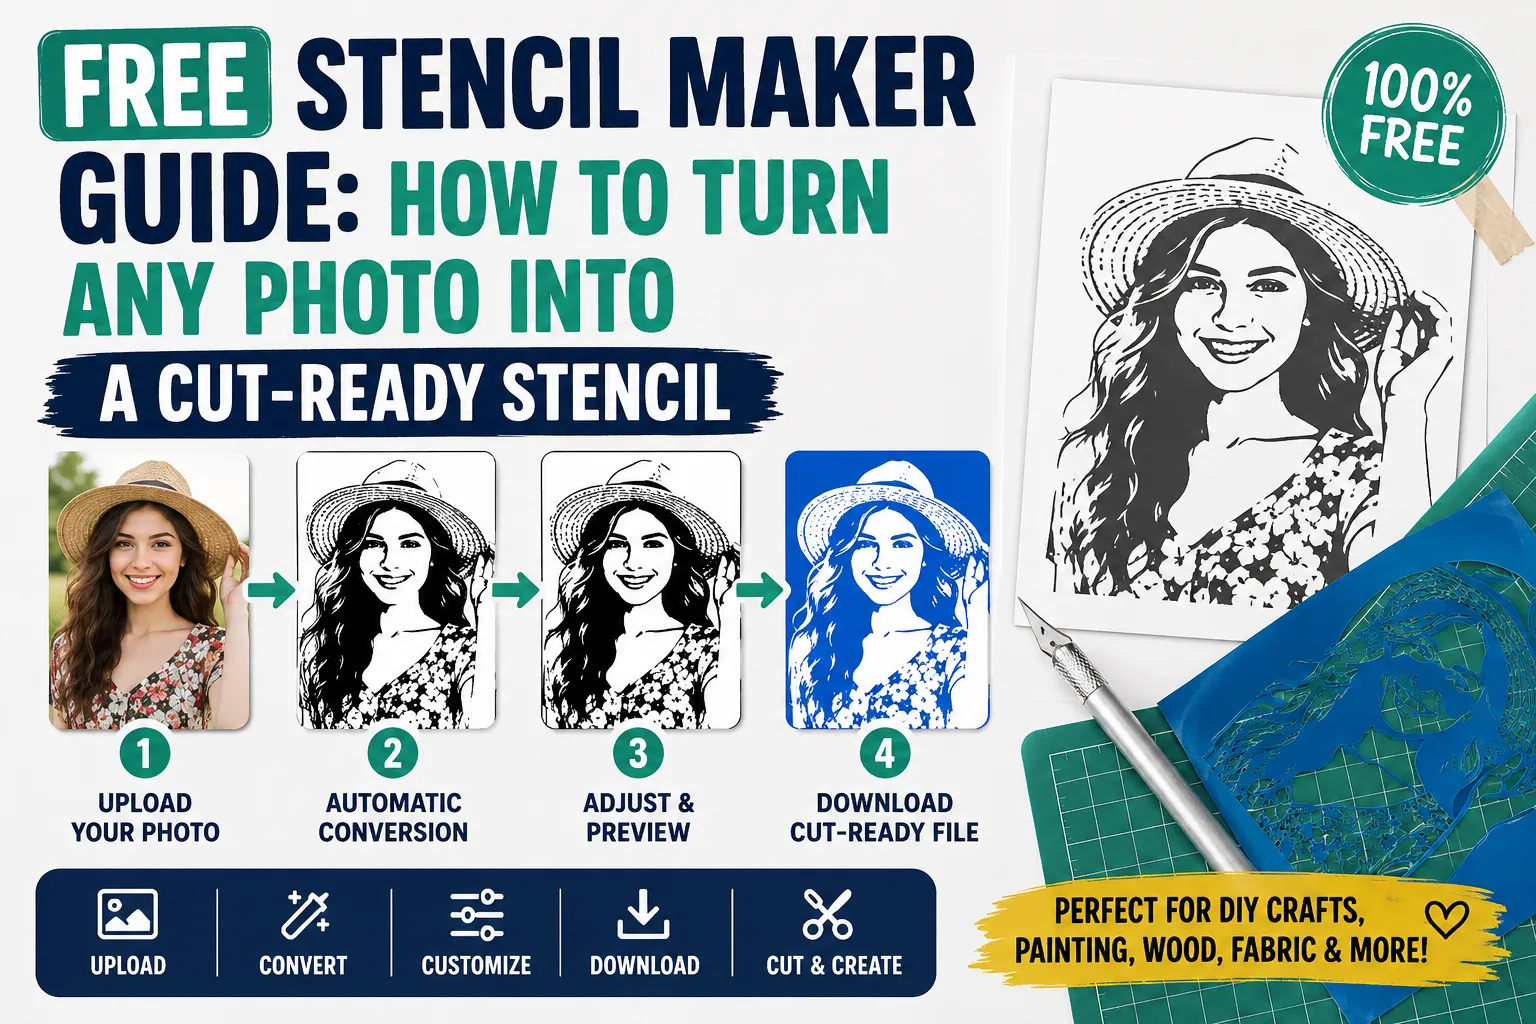
A free stencil maker is a browser-based tool that turns a photo, logo, sketch, or block of text into a cuttable outline by boosting contrast, tracing edges, and stripping away small details. What most guides skip: the two things that actually decide whether your stencil survives being cut a clean threshold setting and properly placed bridges between disconnected “island” pieces matter more than which specific tool you use.
This guide covers every type of free stencil maker available online, the technical concepts that determine whether your output actually cuts cleanly, and a decision framework for picking the right approach for your project: printable craft stencil, tattoo transfer, spray-paint art, or a laser-ready cutting-machine file.
What Is an Online Stencil Maker? Free Stencil Maker Guide
An online stencil maker is a browser-based tool that converts a photo, logo, or piece of artwork into a simplified, high-contrast stencil pattern. Most work the same basic way: increase contrast, detect edges, flatten the image to black-and-white (or a small number of tonal layers), and remove details too small to survive cutting.
A stencil maker is different from a general photo editor or background remover. Those tools simplify an image for viewing. A stencil maker has to simplify an image for cutting every shape in the output has to physically hold together once the surrounding material is removed. That single requirement is what separates real stencil software from an ordinary line-art or sketch filter.
Why Use a Free Online Stencil Maker?
Free stencil makers exist because turning a photo into a clean, cuttable outline by hand manual tracing, building bridges, checking for disconnected pieces can take hours. A decent automated tool gets you most of the way in minutes.
Main benefits:
- No design software or manual tracing skill required
- Works directly in a browser, on desktop or mobile
- Lets you test whether an image can become a stencil before committing material to it
- Speeds up printable templates for classrooms, painting, and craft projects
- Some tools prepare cutting-machine-ready vector files automatically
The trade-off: free tools usually cap resolution, watermark exports, limit how many stencils you can generate per month, or reserve vector/SVG export for a paid tier. That doesn’t make them unusable it just means you should know what you actually need (a printable image vs. a laser-ready vector file) before picking a tool, so you’re not stuck rebuilding your work later.
Types of Free Stencil Maker Tools
Not every stencil maker does the same job. Here are the categories you’ll run into, what each is actually built for, and where each tends to fall short.
1. AI Photo-to-Stencil Converters
Upload-and-go tools that use edge detection and contrast algorithms to convert a photo into a stencil automatically, usually in one click.
Best for: quick conversions, portraits, tattoo-style outlines, testing an idea before manual editing.
Look for: adjustable strength or intensity after the automatic pass a tool that only gives one fixed result is hard to fix when it misreads an image.
Limitation: automated output can keep too much decorative detail (hair strands, background texture) that turns into dozens of tiny, unstable islands once you try to actually cut it.
2. Manual Threshold and Contrast Editors
Sliders instead of a single “convert” button threshold, contrast, edge strength, line thickness so you tune the result yourself rather than trusting one automated pass.
Best for: fixing a messy automatic result, or reproducing a specific look (thin line art vs. bold high-contrast).
Look for: a live preview that updates as you drag each slider, instead of re-uploading to see every change.
Limitation: more setup time, and the result still depends heavily on how clean the source photo was to begin with.
3. Multi-Layer / Color-Separation Stencil Generators
Instead of one black-and-white output, these split an image into two or more tonal layers light, medium, dark each exported as its own stencil to be sprayed or painted in sequence.
Best for: layered spray-paint art, portrait stencils with real shading, multi-color wall art.
Look for: registration marks or alignment guides included in the export, so the layers actually line up on the wall or canvas.
Limitation: harder to plan and cut than a single-layer stencil each layer’s islands need to be bridged independently.
4. Vector and Laser-Ready Stencil Generators
Built specifically for cutting machines and laser cutters. These convert an image into a vector file (usually SVG) and check structural integrity automatically meaning the tool looks for floating islands and adds bridges for you.
Best for: laser cutting, vinyl cutting, anything where a blade or beam needs an exact path rather than a printed outline.
Look for: automatic bridge and island detection the single feature that separates a “toy” converter from something built for production cutting. For the manual version of this process, our Illustrator stencil design guide walks through preparing vector files by hand.
Limitation: more technical than a one-click tool; beginners may need to learn basic vector and bridge concepts to get good results.
5. Text and Layout-Based Stencil Makers
Not photo converters at all — these are design tools for building stencils from typed text, shapes, and simple layouts: alphabet stencils, name stencils, number templates, address plaques.
Best for: lettering, labels, monograms, simple printable craft sheets.
Look for: genuine stencil fonts (blocky letterforms with built-in bridges) rather than regular fonts, which usually aren’t cuttable as-is.
Limitation: not built to convert photographs or complex artwork — it’s a layout tool, not an image converter.
6. General Photo Editors (as a Prep Step)
General-purpose online photo editors aren’t dedicated stencil makers, but they matter as preparation: removing a background, boosting contrast, or cropping tight to the subject before the photo ever reaches a stencil converter.
Best for: cleaning up a busy or low-contrast photo before conversion — most “bad stencil” complaints trace back to a source image that skipped this step.
Limitation: on their own, these don’t produce a cut-ready stencil; they just make the next tool’s job easier.
7. Cutting-Machine Design Software
The software that actually drives a home cutting machine or vinyl cutter. It matters because it’s where you confirm a file is genuinely cuttable, not just where you generated the stencil.
Best for: the final check before you cut verifying cut lines, layer order, and material settings.
Look for: support for both vector uploads (SVG/DXF) and raster uploads (PNG/JPG), since not every stencil converter exports vector files.
Limitation: a finishing step, not a stencil generator a design that looks fine in a stencil maker can still need cleanup once it’s loaded here.
8. Offline / Desktop Editors
Full desktop image editors aren’t browser-based stencil makers, but they’re worth knowing as a free fallback when an automated tool keeps producing a messy result and you need full manual control over contrast, cleanup, and detail removal.
Best for: difficult source photos, heavy manual cleanup, anyone who wants complete control without a subscription.
Limitation: a real learning curve compared to an upload-and-go web tool.
Quick Comparison
| Tool Type | Best Use | Beginner-Friendly? | Cutting-Machine Ready? | Main Limitation |
|---|---|---|---|---|
| AI photo-to-stencil converter | Fast portrait/photo stencils | Yes | Sometimes (check export options) | May keep too much detail |
| Manual threshold editor | Fine-tuned printable stencils | Medium | Rarely (usually raster only) | More trial and error |
| Multi-layer generator | Layered spray-paint art | Medium | Sometimes | Harder to plan and align |
| Vector/laser-ready generator | Laser and vinyl cutting | Medium–Advanced | Yes | Steeper learning curve |
| Text/layout stencil maker | Lettering, names, labels | Very easy | Depends on export | Not for photos |
| General photo editor | Pre-cleanup before conversion | Easy | No | Not a stencil generator alone |
| Cutting-machine software | Final cut-file verification | Medium | Yes (that’s its job) | Doesn’t generate the stencil |
| Offline desktop editor | Heavy manual cleanup | Hard | Depends on export | Learning curve |
How to Choose the Right Stencil Maker for Your Project
The best tool depends on what you’re making — not which tool has the most reviews.
- Choose an AI photo-to-stencil converter if you have a clear photo and want a fast, automatic result with minimal setup.
- Choose a manual threshold editor if an automatic tool already gave you a messy result, or your source photo has tricky lighting.
- Choose a multi-layer generator if you’re planning spray-paint or wall art with real shading, not just a flat silhouette.
- Choose a vector/laser-ready generator if the final stencil will be cut by a laser or a cutting machine rather than by hand.
- Choose a text/layout tool if you’re making lettering, names, or numbers rather than converting a photo.
- Choose a general photo editor first if your source image has a busy background, poor contrast, or needs cropping — clean it up before it reaches a converter.
Key Concepts Every Stencil Maker Should Get Right
This is the part most “best tools” roundups skip, and it matters more than which tool you pick.
Threshold and Edge Detection
Threshold is the single most important control in any stencil maker. It decides which grey tones become solid (cut or painted) and which become empty space (kept material). Set it too low and you lose detail; too high and shadows merge into solid blobs. For most portraits, somewhere in the 40–60% range is a reasonable starting point — but the right number always depends on the specific photo’s lighting and contrast, so treat that as a starting point to adjust from, not a fixed setting.
Edge detection works alongside threshold to trace clean outlines rather than filling large tonal blocks — useful for logos and line-based designs, less useful for reproducing photographic detail.
Bridges and Islands
This is the concept that decides whether a stencil survives being cut at all — and why a design that looks perfect on screen can fall apart in your hands.
Cut the center out of a letter “O” (or “A,” “B,” “D,” “P,” “R” any shape with an enclosed area) and that center piece the island has no physical connection to the rest of the stencil. It falls out. A bridge is a small strip of material left uncut, connecting the island back to the surrounding stencil. Bridges leave a small gap in your finished painted design, which is why stencil lettering has that recognizable “broken” look that’s not a style choice, it’s structural necessity.
Practical guidelines:
- Bridges generally need to be at least 1/16 inch wide (roughly 1.5mm) on small, detailed designs, and 1/8–1/2 inch on larger ones thinner material like paper needs wider bridges than sturdier material like stencil vinyl, or they tear on first use.
- Two bridges on opposite sides of an island hold it more securely than one wide one.
- Place bridges where the eye already expects a visual break a corner, a fold, a change in direction rather than across the middle of a smooth curve, where the gap is more noticeable.
- A good vector/laser-ready generator will detect islands and place bridges automatically; simpler photo-to-stencil converters usually won’t, so check manually before cutting.
Vector vs. Raster Files
This decides whether your stencil is cutting-machine-ready or print-only.
Raster files (PNG, JPG) are a fixed grid of pixels. They’re what most photo-to-stencil converters export by default, and they’re perfectly fine for printing on paper and hand-cutting. They lose quality if enlarged past their original resolution.
Vector files (SVG, DXF) store the design as mathematical paths rather than pixels, so they scale to any size without blurring — and just as importantly, a cutting machine or laser reads those paths directly as its cut line. A raster file has no cut line at all; cutting software has to guess one by tracing the image, which is where jagged edges and missed detail creep in.
Practical rule: printing on paper and cutting by hand → raster (PNG/JPG) is fine. A machine or laser doing the cutting → look for a tool that exports SVG or DXF, not just PNG.
Resolution and DPI
For anything you’ll print, aim for at least 300 DPI (dots per inch) at the final size you need. An image sized for on-screen viewing is often only 72 DPI, which looks fine on a monitor but turns visibly blocky once printed — especially at larger stencil sizes (our guide on how to scale a stencil without losing quality covers this in more depth). If you’re starting from a phone photo, check the actual pixel dimensions against your target print size before you invest much time in editing.
Single-Color vs. Multi-Layer Output
A single-color (single-layer) stencil is the simplest: one cut, one color. Multi-layer output separates an image into two or more tone-based layers, each cut and applied separately to build up shading or multiple colors — more realistic results, more setup and alignment work.
Best Materials for Cutting Your Stencil
The right file format also depends on what you’re cutting it out of — for a deeper breakdown of each option, see our complete guide to stencil materials:
- Mylar or stencil vinyl — the standard choice for reusable stencils. Durable enough for repeated use, translucent enough to see your reference image underneath while cutting by hand.
- Cardstock or heavy paper — fine for a stencil you’ll only use once or twice; needs wider bridges than mylar since paper tears more easily.
- Contact paper or freezer paper — the standard choice for fabric stenciling, since the adhesive or heat-activated side sticks to the material and stops paint from bleeding underneath.
- Adhesive vinyl — cut on a home cutting machine, used for walls, glass, and smooth hard surfaces.
- Foam board or heavier card — better for large-scale outdoor or street-art stencils that need to hold their shape through repeated spray sessions.
Step-by-Step: How to Make a Stencil Online for Free
- Start with a clean image. Look for a clear subject, strong contrast, a simple background, and minimal fine detail. Busy backgrounds and soft, even lighting are the two most common reasons a conversion comes out messy.
- Simplify the background first if needed. If the photo has a busy or cluttered background, remove or blur it in a general photo editor before converting — this alone fixes a large share of bad results.
- Upload to the right type of converter for your goal — an AI converter for a quick result, a manual threshold editor for more control, or a vector/laser-ready generator if a cutting machine will do the cutting.
- Adjust threshold, edge strength, and detail level until the design is recognizable with as few separate pieces as possible. Fewer, cleaner shapes beat “more detail” almost every time.
- Check for islands. Zoom in and look for dark shapes fully enclosed by empty space — eyes, letter centers, gaps between fingers. Add or confirm bridges before you export.
- Download the right file format — a raster image for printing and hand-cutting, SVG or DXF if a cutting machine or laser will do the work.
- Test print on plain paper first. Check size, line thickness, and readability before committing your actual stencil material.
Common Mistakes When Making Stencils Online
- Starting with a low-quality image. A blurry or poorly lit photo produces a blurry, poorly defined stencil — no amount of editing fully fixes a bad source image.
- Keeping too much detail. Stencil design is fundamentally about simplification; every extra bit of fine detail is a potential island that has to be bridged or removed.
- Skipping bridges entirely. The single most common reason a finished stencil falls apart mid-project.
- Downloading the wrong file format. A print-only raster file sent to a cutting machine forces the software to guess cut lines instead of following exact paths.
- Trusting automatic output without checking it. Automated converters can look clean on screen and still have fragile, unbridged islands you won’t notice until the material is already cut.
- Using the wrong category of tool for the job. A layout tool isn’t built to trace a photograph, and a photo converter isn’t built to lay out clean lettering — match the tool type to the task.
Real-World Use Cases
- Printable wall art or home décor — convert a simple photo or icon into a black-and-white stencil, print it, transfer it to your material, and hand-cut.
- Cutting-machine vinyl decals — simplify the photo, clean it up, export as SVG if the converter supports it, then load into your cutting machine’s own software. Our Cricut stencil design beginner guide walks through this workflow.
- Laser-cut signage or art — use a vector/laser-ready generator that checks structural integrity, and always test-cut on scrap material before committing to the final piece. See our laser cutter settings guide for speed, power, and material-specific settings.
- Text and name stencils — use a text/layout stencil maker with genuine stencil fonts (built-in bridges) rather than a regular font run through a converter.
- Multi-layer spray-paint or portrait art — use a multi-layer generator to separate tones, and rely on registration marks to keep every layer aligned. Our spray paint stencil techniques guide covers layering and overspray in more depth.
- Henna and mehndi stencil design — convert a clean line drawing or reference photo into a high-contrast outline, keep the design simple enough that fine details survive as connected shapes rather than floating islands, and size it to the exact area of skin it will cover before printing. Browse our simple mehndi stencils for beginners guide for pattern ideas.
Frequently Asked Questions
What is the best free stencil maker for beginners? An AI photo-to-stencil converter is the easiest starting point for turning a photo into a stencil with minimal setup. For text or name stencils, a dedicated layout tool is simpler than running lettering through a photo converter.
Can I make a stencil from a photo online for free? Yes. Most free stencil makers let you upload a photo and convert it into a high-contrast outline at no cost, though export resolution, watermarks, or vector (SVG) export are sometimes limited to a paid tier.
Which type of stencil maker is best for a cutting machine? Look specifically for a vector or laser-ready generator that exports SVG or DXF files with automatic bridge detection. A plain photo-to-stencil converter that only exports a raster image will need extra tracing work before it’s truly cutting-machine-ready.
Are free stencil maker tools good enough for professional use? They’re genuinely good enough for craft projects, printable patterns, and testing an idea. For commercial production, selling designs, or laser manufacturing at scale, you’ll likely still need manual vector cleanup at some point.
What file format is best for stencil cutting? A vector format (SVG or DXF) for anything a machine or laser will cut — it stores exact paths rather than pixels. A raster image (PNG/JPG) is fine for printing and hand-cutting but has no true cut line for a machine to follow.
Why does my stencil keep falling apart when I cut it? Almost always a missing bridge. Zoom into your design before cutting and look for any shape completely enclosed by empty space — that’s an island, and without a connecting bridge it will fall out the moment it’s separated from the rest of the material.
How much detail is too much for a stencil? If a feature is thinner than your material can support once cut — individual hair strands, fine lace patterns, thin chain-link textures — it’s too much detail. These become dozens of unstable islands rather than one clean shape.
Quick Checklist Before You Choose a Tool
- Do you need a print file, or a machine/laser-ready vector file?
- Is this for hand-cutting, a cutting machine, or a laser?
- Does your design need bridges, and does the tool add them automatically?
- Is the source image simple and high-contrast enough to convert cleanly?
- Does the free plan actually let you download without a watermark?
- Can you adjust threshold, edge strength, or line thickness — or only accept one fixed result?
Final Recommendation
For most beginners, the fastest reliable path is: clean up the source image first (background removed, good contrast, simple composition), run it through an AI photo-to-stencil converter or manual threshold editor, zoom in and check for unbridged islands, then export the right format for how you’re actually cutting it — a raster image for hand-cutting, SVG or DXF for a cutting machine or laser. Test print on plain paper before you touch your actual stencil material — it’s the fastest way to catch a sizing or detail problem while it still costs nothing to fix.