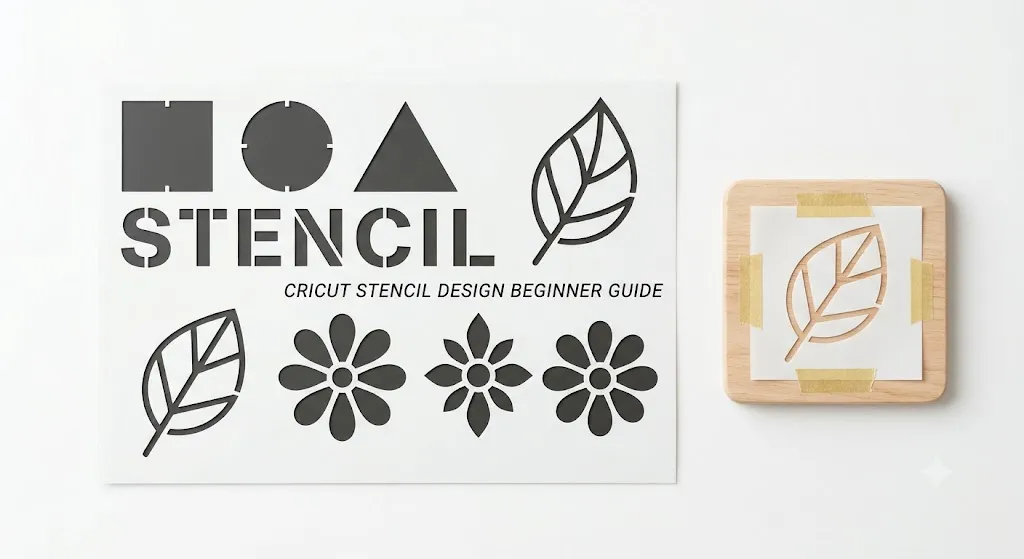
Making your first stencil with a Cricut can feel confusing because a stencil works differently from a normal vinyl decal. With a decal, you usually keep the letters or artwork and remove the background. With a stencil, you often remove the parts that paint, ink, paste, or etching cream will pass through. That small difference is where many beginners get stuck.
This Cricut stencil design beginner guide explains the full process in simple steps: choosing the right material, designing in Cricut Design Space, preparing cut-ready artwork, cutting the stencil, weeding the correct pieces, applying transfer tape, painting cleanly, and fixing common beginner mistakes.
This article belongs to the Stencil Making Tools & Techniques silo. For the full learning path, start with the main pillar: Stencil Making Tools & Techniques Complete Guide.
What Is a Cricut Stencil?
A Cricut stencil is a cut design made with a Cricut cutting machine and used as a template for painting, etching, drawing, decorating, or crafting. The Cricut cuts openings into stencil vinyl, stencil film, acetate, mylar-style sheets, or another compatible material. Those openings become the areas where paint or another medium reaches the project surface.
Common Cricut stencil projects include:
- Wood signs
- Wall art
- Glass etching
- Fabric painting
- Tumblers
- Door mats
- Gift boxes
- Cake and cookie decorating templates
- Reusable craft stencils
- Home organization labels
- Seasonal decor
For beginners, Cricut stencils are useful because they allow you to repeat the same design neatly without drawing everything by hand.
Why Beginners Struggle With Cricut Stencils
Most beginner problems come from three areas: design setup, material choice, and application technique.
A stencil must have strong connected shapes. Tiny floating details can be difficult to transfer or may fall out during weeding. Thin lines may tear. Very small letters can fill with paint. A design that looks beautiful on screen may not work well once it becomes a physical stencil.
Beginners also confuse vinyl decals with vinyl stencils. A decal is the final design. A stencil is only a temporary guide. The stencil is removed after paint, ink, paste, or etching cream is applied.
If your goal is to make stronger, reusable templates, read this related same-silo guide next: How to Make Reusable Stencils with Cricut.
Best Cricut Machines for Beginner Stencil Design
You can make stencils with many Cricut machines, including Cricut Explore, Cricut Maker, Cricut Joy, and Cricut Venture models. The best choice depends on your project size and material.
Cricut Joy
Cricut Joy is good for small labels, mini signs, cards, jars, and quick stencil projects. It is compact and beginner-friendly, but the cutting width is limited.
Cricut Explore Series
The Explore series is a strong beginner option for home decor, wood signs, wall stencils, and vinyl stencil projects. It handles many common craft materials and is widely used for stencil vinyl.
Cricut Maker Series
The Maker series is better if you want more material flexibility. It is useful for crafters who plan to cut thicker or more varied materials beyond simple stencil vinyl.
Cricut Venture
Cricut Venture is more suitable for larger-format projects, business use, signage, and high-volume cutting.
Cricut’s official Smart Stencil and Stencil Film instructions explain that users customize the design in Design Space, select Make It, choose the correct material load style, and use the Flexible Stencil Film setting when appropriate. Cricut also notes that stencil film is used on a machine mat with the liner side down.
Best Materials for Cricut Stencils
Choosing the right stencil material is one of the most important beginner decisions.
1. Stencil Vinyl
Stencil vinyl is adhesive and flexible. It sticks to the project surface, which helps reduce paint bleeding. It is usually best for one-time or limited-use projects.
Best for:
- Wood signs
- Glass jars
- Painted boxes
- Smooth surfaces
- Beginner practice projects
Pros:
- Easy to apply
- Helps create crisp lines
- Good for curved surfaces
- Beginner-friendly
Cons:
- Usually not reusable
- Can stretch if handled roughly
- May stick too strongly to delicate surfaces
2. Stencil Film
Stencil film is a thin plastic-like stencil material. It can be used for flexible reusable templates, depending on thickness and project type.
Best for:
- Reusable craft stencils
- Painting on flat surfaces
- Signs
- Repeated pattern work
Pros:
- More durable than regular vinyl
- Can be reused carefully
- Good for repeated designs
Cons:
- May need adhesive spray or careful taping
- Can allow paint bleed if not pressed down well
- Small details may lift during painting
3. Removable Vinyl
Removable vinyl can work as a budget stencil material for simple projects. It is not always ideal, but many beginners use it for practice.
Best for:
- Testing designs
- Simple signs
- Temporary stencil projects
- Smooth surfaces
Pros:
- Easy to find
- Affordable
- Good for learning
Cons:
- Not designed specifically for stenciling
- May not seal as well as stencil vinyl
- Usually not reusable
4. Mylar-Style Sheets
Mylar-style sheets are popular for reusable stencils. They can be more durable, but cutting settings depend on thickness and machine compatibility.
Best for:
- Reusable wall stencils
- Pattern stencils
- Craft businesses
- Repeated painting projects
Pros:
- Durable
- Washable
- Reusable
Cons:
- Requires testing
- Thicker sheets may need different settings
- Small cuts can be harder to weed
For a deeper comparison of material choices, see Best Stencil Materials for Cricut Beginners.
Tools You Need Before You Start
Before opening Design Space, gather your basic tools.
You will need:
- Cricut machine
- Cricut Design Space
- Stencil vinyl, stencil film, or suitable stencil material
- Cutting mat if required
- Fine-point blade or correct blade for your material
- Weeding tool
- Scraper or brayer
- Transfer tape for adhesive stencils
- Painter’s tape
- Paint, ink, paste, or etching cream
- Sponge brush, stencil brush, or foam roller
- Test surface
Cricut’s vinyl instructions recommend starting with a clean, dry project surface and performing a test cut with a small basic shape to verify cut settings. This is especially important for beginners because stencil success depends on a clean cut without tearing or under-cutting.
How to Design a Cricut Stencil in Design Space
Step 1: Choose a Beginner-Friendly Design
Start with a simple design. Avoid thin scripts, tiny details, and complex lace patterns for your first stencil.
Good beginner designs include:
- Bold words
- Simple icons
- Large flowers
- Geometric shapes
- Farmhouse signs
- One-color logos
- Basic borders
- Large monograms
Avoid:
- Very thin cursive fonts
- Tiny dots
- Detailed mandalas
- Small distressed texture
- Thin outlines
- Complex multi-layer artwork
A stencil needs enough material between cut areas to stay strong. If the design has too many small openings, the stencil may tear or lose shape.
Step 2: Open Cricut Design Space
Create a new project in Cricut Design Space. Add your text, image, or uploaded file to the canvas.
If you upload your own image, Cricut explains that Design Space supports raster file types such as JPG, BMP, PNG, GIF, and HEIC, plus vector file types such as SVG and DXF on supported platforms. Vector images like SVG files are generally easier for clean stencil cutting because they are already cut-ready.
Step 3: Size the Design Correctly
Measure your project surface before sizing the stencil.
For example:
- A 12-inch wood sign may need a 9–10 inch wide design.
- A jar label may need a 2–3 inch wide design.
- A door mat stencil may need large bold letters.
- A tumbler stencil may need a curved-friendly narrow layout.
Beginner tip: Make your first stencil larger than you think. Bigger designs are easier to weed, easier to paint, and less likely to fail.
Step 4: Use Bold Fonts and Strong Shapes
For text stencils, choose readable fonts.
Best beginner font styles:
- Bold sans-serif
- Block letters
- Slab serif fonts
- Thick handwritten fonts
- Rounded display fonts
Avoid ultra-thin script fonts until you understand bridges, islands, and weeding.
Step 5: Understand Islands and Bridges
This is one of the most important stencil design concepts.
An island is a floating inside piece, such as the center of the letters O, A, D, P, R, B, and e. If the stencil material around it is removed, the inside piece may detach.
A bridge is a small connection that holds an island in place.
For example, a traditional stencil font breaks letters slightly so the center parts stay connected. If you use a regular font, you may need to add bridges manually or rely on transfer tape to hold the stencil pieces during placement.
Step 6: Attach or Weld Where Needed
In Cricut Design Space, beginners often forget to keep related pieces together. If your design contains separate letters or decorative elements, use the correct operation so the project cuts as expected.
General guidance:
- Use Attach to keep layout positions together on the mat.
- Use Weld to merge overlapping shapes or letters into one cut shape.
- Use Slice when creating cut-out stencil effects from shapes.
- Use Contour to hide unwanted cut areas if needed.
The exact tool depends on the design, but the beginner rule is simple: before clicking Make It, check whether the preview matches the stencil you want.
Step 7: Add a Stencil Border
A border makes the stencil easier to handle. Instead of cutting only letters or shapes, place your design inside a rectangle, square, circle, or custom frame. The outside frame gives you extra material to tape down.
Good stencil border sizes:
- Small label stencil: 0.5 inch margin
- Wood sign stencil: 1–2 inch margin
- Wall stencil: 2+ inch margin
- Reusable pattern stencil: wider edges for taping
A stencil without enough margin is harder to paint cleanly.
Step 8: Preview Before Cutting
Click Make It and study the preview. Ask:
- Are all parts in the correct position?
- Is the stencil the right size?
- Are small details too tiny?
- Are letters cutting separately by accident?
- Is there enough border space?
- Will I weed the painted area or the background?
Do not skip this step. Most Cricut stencil mistakes are visible in the preview before cutting.
How to Cut a Cricut Stencil
Step 1: Place Material Correctly
For mat-based stencil film, Cricut instructs users to place stencil film liner side down on a StandardGrip or LightGrip machine mat. Make sure the material is smooth and firmly attached to the mat.
Use a brayer or scraper to remove bubbles. If the material lifts during cutting, the blade may drag and ruin the stencil.
Step 2: Choose the Right Material Setting
Select the material setting that matches your stencil material. Cricut’s material setting guide explains that connected machines show pre-programmed material setting tiles in Design Space, and users can choose the relevant setting from there.
For beginners, the safest approach is:
- Select the closest official material setting.
- Run a small test cut.
- Adjust pressure only if needed.
- Avoid cutting a full sheet before testing.
Step 3: Load the Mat or Smart Material
Load the mat according to your Cricut machine prompts. Keep the mat straight and ensure the material is stuck down flat.
If using Smart Materials without a mat, Cricut notes that machines need extra material above and below the design so rollers can grip and measure the material properly. This matters because trimming too early can cause loading problems.
Step 4: Cut the Stencil
Press Go and let the machine cut. Stay nearby during your first few cuts. If the material shifts, pauses strangely, or tears, stop and check the setup.
Step 5: Unload Carefully
After cutting, unload the mat. Do not pull the stencil material off too quickly. Bend the mat away from the material instead of curling the stencil upward. This helps prevent curling and tearing.
How to Weed a Cricut Stencil Correctly
Weeding a stencil is different from weeding a vinyl decal.
With a stencil, remove the parts where paint or medium will go. Cricut’s stencil instructions specifically explain that when creating a stencil, you remove the parts of the cut that will be filled with paint, ink, etching cream, or another medium.
Beginner Weeding Rule
Ask: “Where do I want paint to appear?”
Remove those areas.
Keep the surrounding stencil material.
Example
If your stencil says “HOME” and you want the word painted onto wood, remove the letters H, O, M, and E from the stencil. The empty letter shapes become the paint openings.
Weeding Tips
- Weed slowly.
- Start from a corner.
- Use good lighting.
- Keep letter centers in place if needed.
- Use tweezers for tiny parts.
- Check the design against the preview.
- Do not throw away small island pieces too quickly.
How to Apply Transfer Tape to a Stencil
Transfer tape helps move adhesive stencil vinyl from the liner to your project surface while keeping the layout intact.
Cricut recommends transfer tape for intricate stencils or designs with many island pieces, such as the inside of letters like O.
Transfer Tape Steps
- Cut transfer tape slightly larger than the stencil.
- Place one edge of the tape onto the stencil.
- Lower the rest slowly to avoid bubbles.
- Burnish with a scraper.
- Flip the stencil and burnish again.
- Peel the liner away slowly.
- Place the stencil onto the project surface.
- Burnish again before removing transfer tape.
Beginner Tip
Use standard transfer tape for most stencil vinyl. Very strong transfer tape may pull delicate stencil parts out of position.
How to Paint With a Cricut Stencil
Cutting the stencil is only half the job. Clean painting technique is what creates crisp results.
Step 1: Clean the Surface
Dust, oil, and moisture can cause stencil lifting. Wipe the surface clean and let it dry.
Step 2: Secure the Stencil
Press all edges down firmly. Use painter’s tape around the outside border.
Step 3: Use Less Paint Than You Think
Too much paint causes bleeding. Load the brush lightly and dab off excess paint before touching the stencil.
Step 4: Dab, Don’t Brush Heavily
Use a vertical dabbing motion with a stencil brush or sponge. Avoid pushing paint sideways under the stencil edge.
Step 5: Apply Thin Layers
Two thin coats are better than one heavy coat.
Step 6: Peel Before Paint Fully Dries
For many paint projects, peeling while the paint is still slightly wet can help prevent lifted edges. Work slowly and pull the stencil back at a low angle.
Common Cricut Stencil Mistakes
Mistake 1: Using Thin Script Fonts Too Early
Thin script looks pretty but often fails as a beginner stencil. Use thick, readable fonts first.
Mistake 2: Forgetting Letter Islands
Letters like O, A, B, D, P, and R have inner shapes that can detach. Use stencil fonts, bridges, or transfer tape.
Mistake 3: Weeding the Wrong Part
Beginners often weed the decal instead of the stencil. Remember: remove the parts where paint should go.
Mistake 4: Skipping the Test Cut
Different materials cut differently. A small test cut can save an entire sheet.
Mistake 5: Using Too Much Paint
Paint bleed is usually caused by excess paint, not the Cricut cut. Use a dry brush technique.
Mistake 6: No Stencil Border
Without a border, it is hard to tape the stencil down or protect the surrounding surface.
Mistake 7: Ignoring Surface Texture
Rough wood, fabric, brick, canvas, and textured walls need extra care. Smooth surfaces are easier for beginners.
Problem-Solution Guide
Problem: My Cricut Stencil Tears While Weeding
Solution: Use a less detailed design, check your cut pressure, and weed slowly. If the blade is cutting too deeply, reduce pressure or test a different setting.
Problem: Paint Bleeds Under the Stencil
Solution: Use less paint, press the stencil edges down firmly, and apply paint in thin layers. For wood signs, sealing the stencil edge with a thin base coat can help.
Problem: My Letters Lose Their Centers
Solution: Use stencil fonts, add bridges, or apply transfer tape carefully so island pieces stay in place.
Problem: The Stencil Does Not Stick
Solution: Clean and dry the surface. Avoid dusty, oily, wet, or heavily textured surfaces. Try stencil vinyl instead of non-adhesive film for smoother beginner results.
Problem: Design Space Cuts Everything Separately
Solution: Use Attach to keep the design layout together before cutting. Always check the Make It preview.
People Also Ask
What is the best Cricut stencil material for beginners?
Stencil vinyl is usually the easiest beginner material because it sticks to the surface and helps reduce paint bleeding. Stencil film is better when you want a reusable stencil, but it can require more careful taping and painting.
Can I make reusable stencils with Cricut?
Yes. You can make reusable stencils with stencil film or suitable reusable plastic sheets, depending on your machine and material thickness. Start with simple shapes and test cut before using a full sheet.
Do I need transfer tape for Cricut stencils?
You need transfer tape for many adhesive stencil vinyl projects, especially if the stencil has words, small details, or island pieces. Simple stencil film designs may not need transfer tape.
What setting should I use for Cricut stencil vinyl?
Use the material setting that matches your stencil product. Cricut provides specific stencil film and vinyl instructions, but settings can vary by machine, blade condition, and material brand. Always test cut first.
Should I mirror a Cricut stencil?
Most paint stencils do not need to be mirrored because they are applied directly onto the surface in normal reading direction. Mirror only if your specific project requires reverse application, such as painting on the back side of glass.
Beginner Cricut Stencil Project Ideas
1. Wood Welcome Sign
A bold welcome sign is one of the easiest beginner projects. Use thick letters and stencil vinyl.
2. Pantry Jar Labels
Use simple words like Sugar, Tea, Coffee, Rice, and Flour. Choose clean fonts and small rectangular stencil borders.
3. Gift Box Pattern
Create stars, hearts, leaves, or geometric shapes and repeat them across gift packaging.
4. T-Shirt Paint Stencil
Use fabric paint and a simple stencil. Avoid tiny details because fabric texture can cause bleeding.
5. Glass Etching Stencil
Use stencil vinyl to create monograms or simple labels on glass jars. Follow all safety instructions for etching cream.
6. Wall Border Stencil
Use a repeating geometric or floral pattern. Larger shapes work better for beginners.
Design Tips for Better Stencils
Good stencil design uses balance, spacing, repetition, and strong contrast. Adobe’s graphic design basics explain repetition as repeated design elements that can create intentional patterns and visual unity. Canva’s design guide explains that symmetry can create balance, harmony, and order in compositions. These principles are useful when designing Cricut stencils because a stencil must look good and remain physically strong after cutting.
Practical Beginner Design Rules
- Use bold shapes.
- Keep spacing generous.
- Avoid tiny floating details.
- Add a border.
- Use symmetry for clean layouts.
- Use repetition for patterns.
- Test small before cutting large.
- Choose the material based on reuse needs.
- Match design complexity to your skill level.
Final Beginner Workflow
Here is the simple Cricut stencil workflow to follow:
- Pick a simple stencil idea.
- Measure the project surface.
- Open Design Space.
- Add text or upload SVG artwork.
- Use bold fonts and strong shapes.
- Add bridges for islands if needed.
- Add a stencil border.
- Attach the layout.
- Check the Make It preview.
- Place material on mat or load Smart Material.
- Select the correct material setting.
- Run a test cut.
- Cut the stencil.
- Weed the paint openings.
- Apply transfer tape if needed.
- Place stencil on the project.
- Use thin paint layers.
- Peel carefully.
- Let the project dry.
- Save notes for your next stencil.
Cricut stencil design becomes much easier once you understand the difference between a decal and a stencil. Start with bold, simple designs, use the right material, test your cut settings, and focus on clean application. Once you master the basics, you can move into reusable stencils, layered patterns, larger signs, wall designs, and more advanced craft projects.
For the full tool-based learning path, return to Stencil Making Tools & Techniques Complete Guide.
9 thoughts on “Cricut Stencil Design Beginner Guide:(How to Make Clean Stencils)”