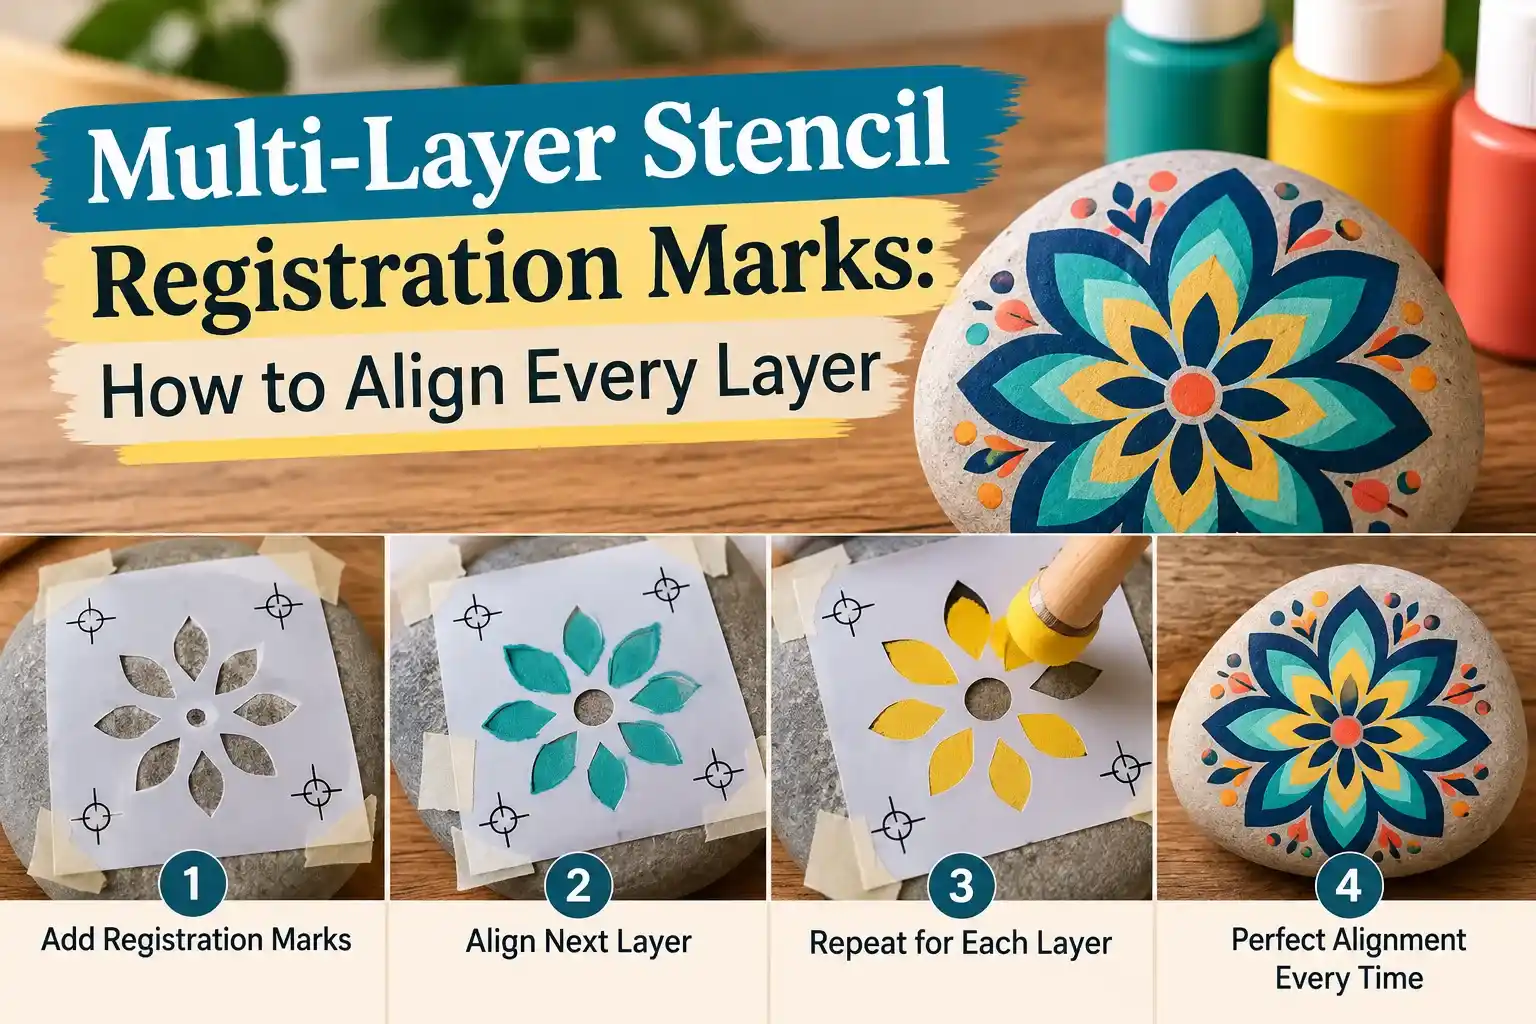
Multi-layer stencils can create detailed portraits, logos and multi-color artwork, but they only work when every layer lands in exactly the right position. That alignment process is called registration.
The simplest way to improve registration is to add matching marks to every stencil layer before cutting. These marks give you fixed reference points so the second, third and later layers line up with the first.
What Are Registration Marks?
Registration marks are small alignment symbols—often crosses, circles, corner ticks or target shapes—placed in the same location on every stencil layer.
When the marks overlap, the artwork should also overlap correctly. This is the same basic principle used in other layered printing processes.
Layered-stencil guides commonly recommend identical marks on each layer because even a small shift becomes visible once colors overlap.
Why Multi-Layer Stencils Go Out of Alignment
- The artwork layers were exported at different canvas sizes.
- Registration marks were moved between layers.
- The stencil sheet shifted while painting.
- Wet paint caused the next layer to slide.
- The surface has no fixed edge or positioning reference.
- The stencil material stretched or curled.
- Layers were trimmed to different outer dimensions.
Best Registration Mark Shapes
Simple marks are usually easiest to use. Good options include:
- small crosshairs;
- circles with center points;
- L-shaped corner marks;
- small triangles;
- two-hole pin marks for repeat production.
The mark should be easy to see and align but not so large that it wastes material.
How Many Registration Marks Do You Need?
Two well-spaced marks can establish position and rotation. Three marks provide an additional check and are useful on larger designs. Place them outside the final artwork whenever possible so they can be covered, masked or removed later.
Step-by-Step: Add Registration Marks Before Cutting
- Create the complete artwork first.
- Separate it into the required tonal or color layers.
- Keep every layer on the same canvas size.
- Add identical registration marks in fixed positions.
- Duplicate the marks onto every layer without moving them.
- Export all layers at the same scale.
- Label each layer clearly: Layer 1, Layer 2, Layer 3 and so on.
How to Align the First Layer
The first stencil establishes the position for everything that follows. Tape it securely, confirm that the artwork is level, then transfer your registration points to the surface or to removable painter’s tape placed beside the artwork.
Do not rely only on the outer edge of a flexible stencil unless every layer is cut to exactly the same dimensions.
How to Align the Next Layers
- Allow the previous paint layer to dry enough that the stencil will not smear or lift it.
- Place the next stencil over the artwork.
- Move it until its registration marks match the fixed reference marks.
- Tape or hold the stencil securely.
- Mask the registration openings if you do not want them painted.
- Apply the next color in thin coats.
- Remove the stencil carefully before continuing.
The Hinge Method
The hinge method uses tape along one edge of the stencil so it can lift and return to the same position. It works well when several layers share identical outer dimensions and you can maintain the same hinge reference.
For small craft projects, hinge alignment can be faster than separate marks. For complex or repeated work, registration marks or pins are generally more reliable.
Registration Pins and Jigs
If you need to reproduce the same layered artwork many times, a simple jig can improve consistency. Two fixed pins or corner stops can position each layer at the same coordinates.
This approach is especially useful for production runs because it reduces the amount of visual alignment required for each copy.
Should You Paint Light to Dark?
For many multi-tone stencil projects, starting with lighter tones and adding darker details later is convenient because dark paint can cover small alignment errors more easily. However, the best order depends on the artwork, paint opacity and surface color.
A recent multi-layer guide describes light-to-dark sequencing as a common workflow, with the darkest detail layer applied near the end.
How Many Layers Should a Beginner Use?
Start with two or three. Every extra layer adds detail, but it also adds another opportunity for misalignment. A three-layer portrait can already create strong separation between highlights, midtones and shadows.
DigitalOnDay’s Stencil Maker includes multi-layer controls that can help simplify an image before you create the physical stencil sheets.
Registration Marks for Photo Stencils
Photo stencils are especially sensitive to alignment because facial features and edges can look wrong after only a small shift. Keep marks far enough apart to control both position and rotation.
If the artwork contains several tonal layers, do not resize individual layers after separation. Resize the complete design first, then generate or export the layers together.
Registration Marks for Logos and Signs
For logos, exact edge alignment is often more important than tonal detail. Use clean crosshairs or corner marks outside the main logo. If the design will be repeated many times, a rigid positioning jig can be faster than redrawing marks for every application.
How to Prevent the Stencil From Moving
- Use low-tack stencil adhesive when appropriate for the surface.
- Tape the outer edges after registration is confirmed.
- Use thin coats rather than heavy wet paint.
- Work on a stable surface.
- Let previous layers dry before repositioning the next stencil.
- Avoid stretching thin plastic while taping it down.
Registration Marks vs Repeating-Pattern Alignment
Multi-layer registration and repeating-pattern alignment are related but different. Multi-layer registration places multiple versions of the same artwork on top of one another. Repeating-pattern alignment moves one motif across a larger surface.
For repeated wall or floor patterns, see our guide to aligning repeating stencils.
Common Registration Mistakes
- Marks too close together: small rotation errors become harder to see.
- Different canvas sizes: layers cannot align even if the artwork appears similar.
- Painting the marks permanently: place them where they can be masked or removed.
- Moving the marks after duplication: all layers must share identical coordinates.
- Working over wet paint: the stencil can slide and smear the previous layer.
Frequently Asked Questions
What is registration in stenciling?
Registration is the process of aligning multiple stencil layers so their shapes and colors land in the intended positions.
Do registration marks get painted?
They can, but most users mask the mark openings, trace them lightly, or place them on removable tape so the final artwork stays clean.
Can I align layers using only the stencil edges?
Yes if every stencil sheet has identical outer dimensions and remains square. Dedicated registration marks are safer when sheets differ or the design is complex.
Why do my layers still look shifted?
Check that every layer was exported at the same scale, the marks were not moved, and the stencil did not slide while painting.
Bottom Line
Good multi-layer stenciling depends less on guesswork and more on repeatable reference points. Add identical registration marks to every layer, keep the canvas size and scale unchanged, and secure each stencil before painting. Once the registration system is correct, even a complex multi-color stencil becomes much easier to reproduce accurately.
1 thought on “Multi-Layer Stencil Registration Marks: How to Align Every Layer”
Comments are closed.