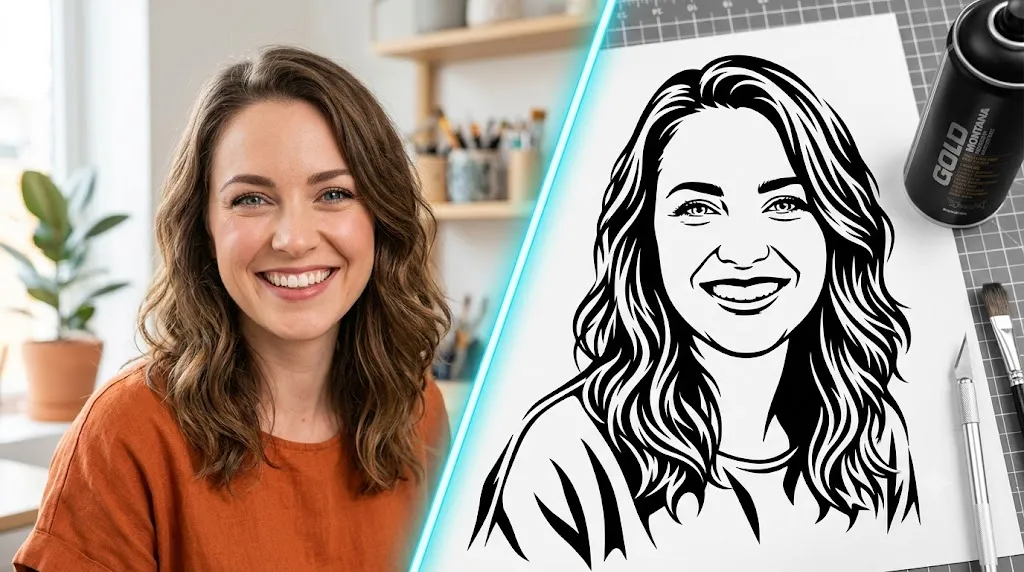
Free Stencil Maker Online turns JPG, PNG, and WebP images into clean stencil artwork directly in your browser. Upload an image, adjust the conversion controls, inspect the cut preview, refine weak areas, and export the finished design as PNG, SVG, or through your browser’s print/PDF workflow.
This page is designed for hands-on browser editing: threshold, edges, contrast, line thickness, cleanup, bridge assistance, manual paint/erase tools, crop, cut preview, sizing, and export. No account is required to use the editor.
Free Stencil Maker Pro
Turn any photo into a clean, print-ready stencil in your browser.
For PDF: choose Save as PDF in your browser print dialog. Tiled mode creates page-by-page sheets with alignment marks.
Turn an Image Into a Stencil Online
The stencil maker simplifies a photo or graphic into strong light-and-dark regions that are easier to print, paint, trace, or cut. Instead of preserving every texture in the original image, the goal is to keep the shapes that matter most to the final stencil.
For cleaner results, start with a clear subject, visible edges, useful contrast, and as little background clutter as possible. Simple source images usually need less cleanup than busy photographs with overlapping objects.
How to Use the Browser Stencil Maker
1. Upload and Crop
Choose a JPG, PNG, or WebP image. Crop away unnecessary background areas so the editor can focus on the part of the image you actually want in the stencil.
2. Choose a Conversion Mode
Use the available edge, thin-line, threshold, adaptive, or color-based modes to create a starting point. Different images respond differently, so compare the previews instead of assuming one setting will work for every picture.
3. Fine-Tune the Result
Adjust black/white threshold, detail sensitivity, contrast, softness, line thickness, noise cleanup, inversion, and outline controls. The best setting is the one that produces clear, stable shapes at the physical size you plan to use.
4. Clean Weak Areas
Use paint, erase, undo, redo, Remove Specks, and Bridge Assist to clean small fragments and strengthen areas that may fail during cutting. A simpler design is often more usable than one that tries to preserve every tiny feature.
5. Check the Cut Preview
Before exporting, inspect narrow connections, enclosed islands, tiny holes, disconnected fragments, and very thin paths. The preview is the best place to catch problems before printing or cutting the stencil.
What Are Stencil Bridges?
A bridge is a small connection that keeps an enclosed area attached to the main stencil sheet. Letters such as O, P, A, and R are common examples because their inner shapes can fall out when the surrounding area is cut away.
Bridge width depends on the material, stencil size, and intended use. Reusable plastic or Mylar often needs sturdier connections than a temporary paper stencil. See our guide to stencil materials for practical material considerations.
Best Images for a Photo Stencil Maker
Source images usually work best when they have a recognizable subject, sharp boundaries, good tonal separation, limited background clutter, and enough resolution for the intended print size. A complicated image can still work, but it normally requires more manual cleanup.
If the final stencil will be small, simplify aggressively. If the design will be printed large, you can keep more structure as long as the bridges and narrow paths remain strong enough.
PNG, SVG, and Print/PDF Export
PNG
PNG is useful for raster-based artwork, quick printing, reference images, and projects that do not require vector paths.
SVG
SVG is useful when you need scalable vector artwork. Vector shapes can be resized without the same pixel-based loss associated with raster images. For the technical format specification, see MDN’s SVG documentation.
Before sending an SVG to a cutting workflow, inspect the paths and stencil bridges. A scalable file is not automatically cut-ready.
Print or Save as PDF
Use the browser print option when you want a paper stencil or a PDF. For large designs, tiled printing can divide the stencil across multiple sheets for assembly.
Useful Stencil Workflows
This browser-based tool is useful for craft stencils, signs, wall designs, painting masks, woodworking layouts, spray-paint projects, simple logos, silhouettes, and reusable stencil sheets.
For text-only designs, use the Name Stencil Maker. If you need a drawing reference grid instead of a stencil conversion, use the Image Grid Maker.
Prepare a Stencil for Real-World Cutting
Before production, check that the design has no fragile islands, accidental gaps, unwanted specks, duplicate-looking fragments, or overly narrow bridges. Material thickness, blade settings, paint method, and final size can all affect how well a stencil works in practice.
If you plan to resize the artwork, read our stencil scaling guide. For vector preparation, see PNG to SVG conversion for stencils.
Free Stencil Maker FAQ
Is this stencil maker free?
Yes. The browser editor can be used without creating an account.
Which files can I upload?
The current editor accepts JPG, PNG, and WebP images.
Can I download an SVG stencil?
Yes. SVG export is available alongside PNG and print/PDF options.
Can I make a stencil on a phone?
Yes. The interface is responsive, although detailed manual cleanup is generally easier on a larger screen.
Why does my stencil have loose pieces?
Loose pieces are usually enclosed islands or disconnected fragments. Use Cut Preview, cleanup tools, and bridge assistance before exporting.
How do I make the stencil easier to cut?
Reduce unnecessary detail, remove tiny fragments, strengthen narrow connections, and keep the design appropriate for its final physical size.
More Stencil Guides
Continue with our stencil-making techniques guide or compare workflows in free stencil maker tools.