Introduction
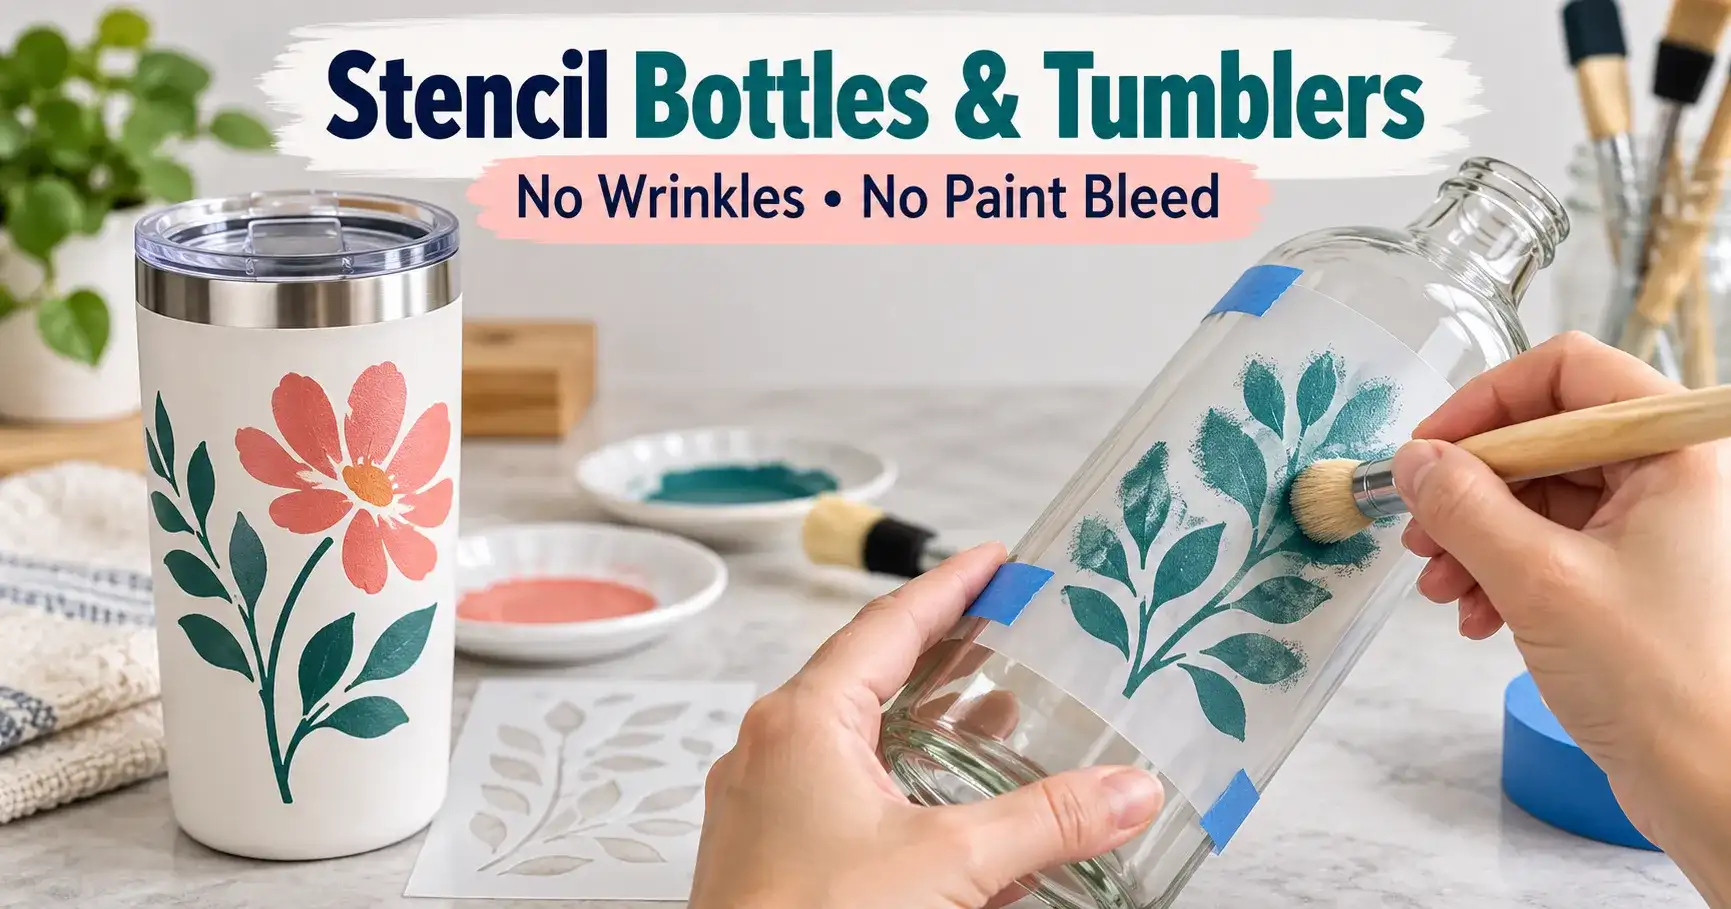
Stenciling bottles and tumblers can be tricky because curved surfaces make stencils more likely to wrinkle, lift, or allow paint to bleed underneath. The key is to choose a flexible stencil, prepare the surface properly, and apply paint in thin, controlled layers. In this guide, you’ll learn how to position a stencil smoothly around curved bottles and tumblers, reduce gaps along the edges, prevent messy paint bleed, and remove the stencil cleanly. These practical steps work well for glass, plastic, stainless steel, and coated drinkware.
Curved surfaces fail because a flat stencil has to change shape
A bottle or tumbler looks simple until a flat stencil is wrapped around it. The center touches first, the outer edges pull outward, and extra material has nowhere to go. That creates wrinkles, bubbles, lifted cut edges, and distorted lettering. Paint then follows the smallest gap under the stencil.
The fix is to reduce tension before painting. Use a design that suits the curve, position from the center outward, give excess stencil material somewhere to move, and burnish only the important cut edges before adding thin paint layers.
Choose the stencil type for the amount of curve
Adhesive stencil vinyl is usually easiest on a small cylindrical surface because it can grip the bottle while you work. Thin flexible Mylar can also work, especially for repeated use, but it may need repositionable adhesive and tape. Thick rigid plastic is harder to keep flush on a tight curve.
| Surface | Better choice | Reason |
|---|---|---|
| Nearly straight tumbler wall | Vinyl or thin Mylar | Low distortion |
| Strong bottle curve | Adhesive vinyl | Conforms in small sections |
| Repeated logo applications | Flexible reusable Mylar | Durable and repositionable |
| Very intricate one-time design | Adhesive stencil film | Holds fine cut edges down |
Make the design narrower than the most curved area
The wider the stencil, the more a flat sheet has to distort around a cylinder. If a logo or wordmark extends too far around the circumference, letters at the edges can tilt or stretch visually. A narrower design may look more centered and professional than a large design forced around the curve.
If you are using a detailed logo, simplify tiny elements before cutting. The detailed logo stencil guide explains how to protect recognition while removing fragile detail.
Clean the bottle without leaving residue
Wash away dust, grease, hand oils, and manufacturing residue. For glass or metal, a final wipe with isopropyl alcohol is commonly used before stencil application, provided it is compatible with the existing coating. Let the surface dry completely before applying vinyl or adhesive.
Do not handle the cleaned application area with oily fingers. Even a small amount of skin oil can reduce adhesion around narrow letters and make bubbles easier to form.
Use the center-out method instead of wrapping from one edge
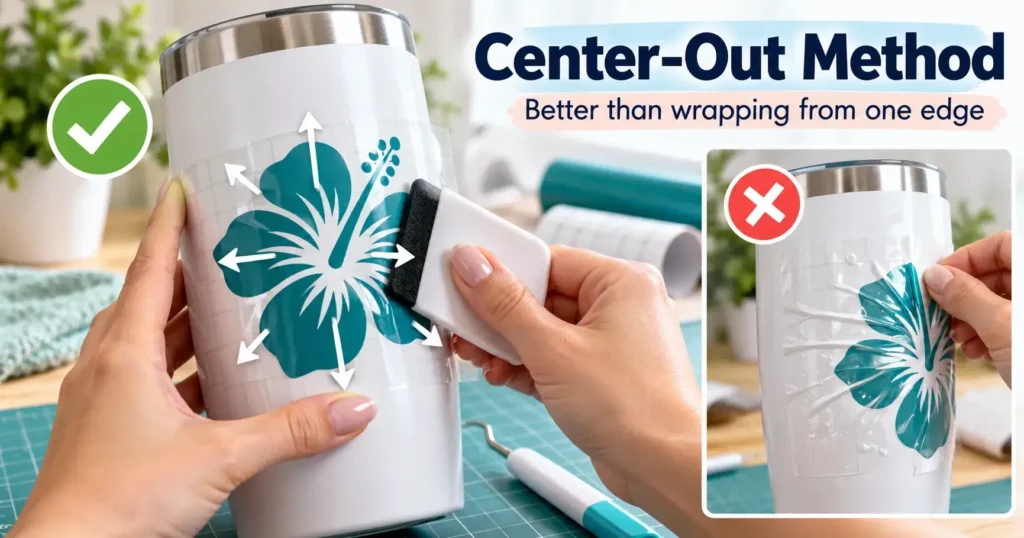
Position the design before removing all backing support if your transfer method allows it. Once aligned, let the middle of the stencil touch the tumbler first. Press outward gradually to the left and right. This sends excess material toward the outer margins instead of trapping it as a bubble under the design.
For adhesive vinyl, a gentle taco shape can help: curve the transfer sheet so only the center contacts first, then smooth outward. Tumbler tutorials use this technique because it gives you more control over where tension is released.
Make relief cuts only in the waste margin
If the stencil puckers around a strong curve, make small radial relief cuts in the outer waste area of the stencil. These cuts allow the margin to overlap itself without forcing the actual design openings to wrinkle.
Never cut through an important bridge, letter, or painted opening. The goal is to relax the surrounding material while keeping the cut edge of the design sealed to the bottle.
Burnish the edges that matter, not every square centimeter
A wrinkle far from the painted opening is usually harmless. A tiny bubble touching the edge of a letter can cause a visible bleed. Run a scraper, squeegee, fingernail, or firm flexible tool around every cut edge and inside small counters. Work slowly around narrow points and corners.
Jennifer Maker’s tumbler stencil process similarly emphasizes smoothing bubbles near the actual design openings; see the stainless steel tumbler stencil tutorial for an example of center-out application and edge burnishing.
Mask beyond the stencil if you are spraying
Spray paint and airbrush overspray can travel well beyond the visible cutout. Add painter’s tape and masking paper around the stencil so exposed glass, metal, or powder coat is protected. Keep the spray angle as close to perpendicular to the surface as possible. Spraying sharply from the side pushes paint under lifted edges.
If spray paint is your main medium, the spray paint stencil techniques guide covers distance, light passes, and overspray control in more detail.
Use less paint than you think you need
Paint bleed on curved objects is often caused by flooding a small opening. Use a stencil brush, foam pouncer, or small sponge with most of the paint offloaded first. Build coverage with thin layers rather than trying to make the first pass fully opaque.
For spray applications, use light mist coats instead of a heavy wet coat. A wet film can bridge across the stencil edge and then tear when the mask is removed.
Support the tumbler so it cannot roll
A bottle that moves while you paint can shift the stencil even if the adhesive is good. Rest it in a cradle, between foam blocks, or on a roll of painter’s tape so the working area faces upward. Rotate the object only when the current section is stable.
This small setup change makes detailed painting easier because both hands are free: one can steady a lifted edge while the other applies paint.
What to do if the stencil wrinkles near a letter
Do not paint over a wrinkle that reaches the cutout. Lift the nearest outer margin gently and smooth the tension away from the opening. If needed, add a tiny relief cut in the waste material and re-burnish the letter edge.
If the adhesive has already picked up dust and will not reseal, replace the stencil rather than forcing more adhesive under a detailed edge. Repositionable spray can be useful with reusable Mylar, but heavy spray adhesive can leave residue and make later cleaning difficult.
Remove the stencil before the paint forms a hard bridge
With many water-based craft paints, removing the stencil while the final coat is still slightly tacky helps prevent a dried paint film from connecting the stencil to the design. Peel slowly and keep the stencil low to the surface rather than pulling straight outward.
If your surface is glass and paint adhesion is a separate concern, the stencil on glass without peeling guide covers surface prep and curing.
Curved-surface troubleshooting table
| Problem | Why it happens | Fix |
|---|---|---|
| Wrinkle through a letter | Stencil too wide for curve | Lift margin, add relief cut outside design |
| Bubble beside cut edge | Center not burnished outward | Press from center to edge |
| Paint bleed | Lifted edge or too much paint | Re-burnish and use lighter coats |
| Letters look stretched | Design wraps too far around cylinder | Reduce design width |
| Stencil shifts | Bottle rolls or weak adhesion | Use a cradle and secure the stencil |
| Smudge on removal | Stencil dragged sideways | Lift slowly away from painted openings |
Curved rocks and bottles share one important rule
Any curved surface creates contact gaps, but the best fix depends on the object. On a rock, you may hold flexible Mylar against the curve in a small area. On a tumbler, adhesive vinyl can distribute contact around a cylinder. If you also work on stones, compare the approach in the painted rock stencil guide.
Final checklist
- Choose thin flexible material for tight curves.
- Keep the design narrower on strongly curved areas.
- Clean and dry the surface before applying the stencil.
- Apply from the center outward.
- Make relief cuts only in waste margins.
- Burnish every cut edge and counter.
- Support the bottle so it cannot roll.
- Use thin paint layers.
- Remove the stencil slowly without dragging it sideways.
Conclusion
Wrinkles are not caused by bad luck; they are the result of forcing a flat sheet around a three-dimensional form. Reduce the stencil width, let the margin relieve its own tension, seal the cut edges, and apply paint lightly. Once the stencil makes clean contact around the design, a bottle or tumbler can produce lines that are almost as crisp as a flat surface.