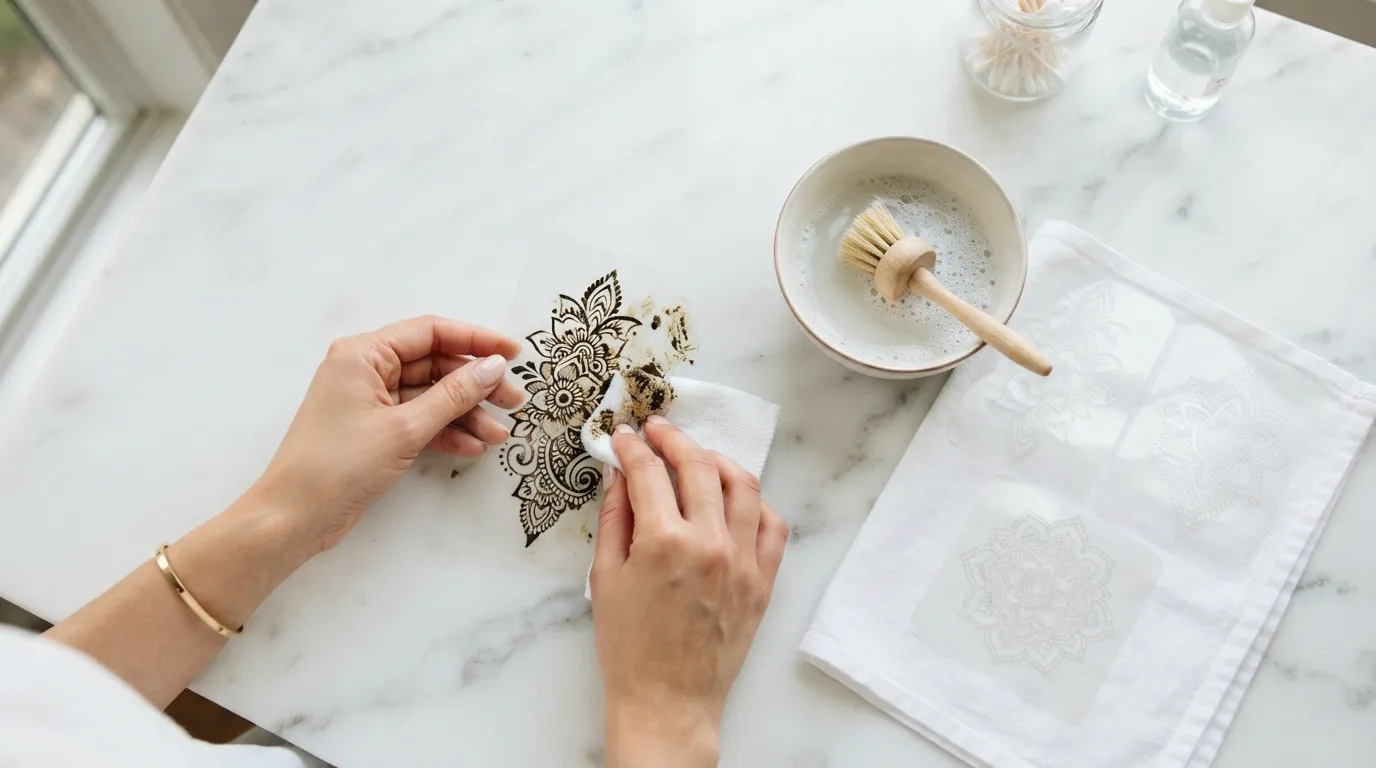
Mehndi stencils are a simple way to create clean henna patterns at home, especially for beginners who want neat floral, Arabic, bridal, or festive designs without drawing every line by hand. But after one use, many people face the same problem: the stencil becomes sticky, stained, bent, or filled with dried henna paste.
The good news is that many reusable mehndi stencils can be cleaned and stored again if they are handled gently. The key is to avoid harsh rubbing, hot water, strong chemicals, and rough peeling. A stencil is useful only as long as its tiny cuts, borders, and adhesive areas stay in shape.
This guide is part of our Mehndi & Festive Stencil Designs Complete Guide, where we explain stencil types, design styles, beginner tips, and festive mehndi ideas. In this article, we will focus only on cleaning mehndi stencils safely after use.
If you are new to stencil mehndi, first understand the basic process in our guide on how to use mehndi stencils at home. Cleaning becomes easier when the stencil is applied and removed correctly from the start.
What Are Mehndi Stencils?
Mehndi stencils are pre-cut templates used to create henna patterns on the skin. The open parts of the stencil allow henna paste to pass through, while the covered parts protect the skin and shape the final design.
Most mehndi stencils are made from thin adhesive sheets, flexible plastic, vinyl-like material, or reusable stencil film. Some are designed for one-time use, while others can be reused several times if cleaned carefully.
Common mehndi stencil types include:
- Adhesive hand stencils
- Reusable henna stencil stickers
- Bridal mehndi stencils
- Arabic mehndi stencil strips
- Floral mehndi stencil patterns
- Finger and wrist stencil designs
- Feet and ankle mehndi stencils
- Kids’ mehndi stencils
The cleaning method depends on the material. A soft adhesive stencil needs more care than a thick plastic stencil. If the stencil has very thin lines, small dots, or detailed floral cuts, clean it slowly to avoid tearing the pattern.
Quick Answer: How Do You Clean Mehndi Stencils?
To clean mehndi stencils, wait until the henna paste becomes dry or semi-dry, then gently peel the stencil from the skin. Remove loose paste with a soft tissue, cotton bud, or blunt scraper. If the stencil is washable, rinse it lightly with cool water and mild soap. Do not scrub the adhesive side. Let the stencil air-dry completely on a flat surface before placing it back on its backing sheet or storing it in a plastic folder.
The most important rule is simple: clean gently and dry fully.
Never twist, stretch, fold, or rub the stencil hard because the small design cuts can lose their shape.
Why Cleaning Mehndi Stencils Matters
Cleaning mehndi stencils is not only about making them look neat. It also helps protect the design quality.
A dirty stencil can cause:
- Blurry mehndi edges
- Uneven paste transfer
- Broken floral details
- Weak adhesive grip
- Smudged design lines
- Skin residue buildup
- Shorter stencil life
When dried henna paste stays inside the small cuts, the next design may not come out clean. The paste can block thin lines, dots, leaves, vines, and bridal-style details.
For example, if you use an Arabic mehndi stencil design, the design usually has flowing vines and open spaces. If old paste dries inside those cuts, the next application may look patchy or incomplete.
Supplies You Need to Clean Mehndi Stencils
You do not need expensive tools. Use soft, simple items.
Basic Cleaning Supplies
- Cool water
- Mild liquid soap
- Soft tissue
- Cotton buds
- Soft makeup brush
- Small bowl
- Clean towel
- Tweezers
- Backing sheet or plastic folder
Optional Supplies
- Baby wipe without strong fragrance
- Soft toothbrush for non-adhesive plastic stencils only
- Blunt scraper or old card
- Small spray bottle
- Parchment paper or stencil backing sheet
Avoid strong cleaners unless the stencil manufacturer clearly says they are safe.
Step-by-Step Guide to Clean Mehndi Stencils
Step 1: Let the Henna Paste Set Before Removing the Stencil
Do not remove the stencil too early. If the henna paste is still very wet, it can smear on the skin and spread into the stencil cuts.
Wait until the paste becomes firm enough to lift cleanly. It does not always need to be rock hard, but it should not be runny.
For natural henna, many artists allow the paste to stay on the skin longer for deeper staining. For reusable stencils, the important point is to remove the stencil slowly and avoid dragging wet paste across the design.
Step 2: Peel the Stencil Slowly
Start from one corner and peel slowly. Keep the angle low and steady.
Do not pull straight upward with force. Do not stretch the stencil. Thin mehndi stencil lines can tear when pulled quickly.
If the stencil sticks too firmly, press the skin gently near the stencil edge and peel little by little.
Step 3: Remove Loose Henna Paste
After removing the stencil, place it on a clean flat surface with the paste side facing up.
Use a soft tissue, cotton bud, or blunt card edge to remove loose dried paste. Move gently in the direction of the design lines.
Avoid digging into small cuts. If the paste is stuck, do not scratch aggressively. Soften it with a small amount of cool water if the stencil material allows washing.
Step 4: Rinse With Cool Water
If the stencil is washable, rinse it under cool running water. Keep the water pressure low.
Do not use hot water because heat can weaken adhesive, curl thin sheets, or distort flexible stencil material.
For adhesive mehndi stencils, rinse mainly the paste side. Avoid rubbing the sticky side too much.
Step 5: Use Mild Soap Only If Needed
If the stencil still feels greasy or sticky from skin oils, use a tiny drop of mild liquid soap in cool water.
Gently move the stencil in the water. Do not crush it between your fingers.
For detailed designs, use a cotton bud to clean small blocked areas.
Step 6: Do Not Scrub the Design
Scrubbing is one of the fastest ways to damage a mehndi stencil.
Avoid:
- Hard toothbrushes
- Rough sponges
- Nail scraping
- Strong rubbing
- Pulling small cut areas
- Twisting the stencil
If the stencil has adhesive backing, never scrub the adhesive side. Scrubbing can remove the tack and make the stencil useless for the next application.
Step 7: Dry the Stencil Flat
Place the stencil on a clean towel or non-stick surface. Let it air-dry naturally.
Avoid using a hair dryer on high heat, and keep the stencil away from direct sunlight for long periods. Also, dry it gently instead of rubbing the thin cuts roughly with a towel.
The stencil must be completely dry before storage. If you store it while damp, it may stick to itself, lose shape, or collect dust.
Step 8: Place It Back on the Backing Sheet
Once the stencil is dry, place it back on its original backing sheet. If you lost the backing sheet, use parchment paper, acetate sheet, or a clean plastic folder.
Keep the stencil flat. Do not fold it.
Cleaning Different Types of Mehndi Stencils
Not every stencil should be cleaned the same way. Use the method that matches your stencil type.
Adhesive Mehndi Stencils
These are common for hand, wrist, finger, and feet designs. They stick to the skin and help beginners apply henna without movement.
How to clean:
- Peel slowly
- Remove dried paste gently
- Rinse lightly if washable
- Avoid scrubbing the sticky side
- Dry fully before reusing
- Store on backing sheet
Best for: beginners, kids, quick festive designs, simple hand patterns.
Main risk: losing stickiness or tearing small parts.
Reusable Plastic Mehndi Stencils
These are usually stronger than adhesive sheets. They may not stick by themselves, so they need tape or gentle pressure.
How to clean:
- Rinse with cool water
- Use mild soap if needed
- Clean cuts with a soft brush
- Dry flat
- Store in a folder
Best for: repeated practice, simple designs, craft-style henna use.
Main risk: bending or warping.
Thin Bridal Mehndi Stencils
Bridal-style stencils often have fine lines, dots, paisleys, leaves, and detailed borders.
How to clean:
- Do not scrub
- Use cotton buds for tiny areas
- Let paste soften before removing
- Dry flat
- Store between sheets
Best for: detailed hands, palms, wrists, and formal mehndi looks.
Main risk: tearing small design bridges.
Arabic Mehndi Stencils
Arabic designs usually have bold lines, floral trails, and open spacing. They are easier to clean than very dense bridal patterns.
How to clean:
- Remove paste from large openings first
- Rinse gently
- Check vine and flower edges
- Dry completely
Best for: modern festive mehndi, Eid designs, quick hand decoration.
Main risk: paste buildup along curved lines.
What Not to Use on Mehndi Stencils
Some cleaning methods look helpful but can damage the stencil.
Avoid these:
- Hot water
- Bleach
- Acetone
- Nail polish remover
- Strong alcohol
- Harsh detergent
- Rough sponge
- Hard brush
- Direct flame or heat
- Machine washing
- Folding while wet
Strong chemicals may remove adhesive, weaken plastic, fade printed marks, or make the stencil curl.
If a stencil is already very delicate, it is better to clean it lightly than to force it back to perfect condition.
How to Remove Dried Henna From a Stencil
Dried henna can become stubborn, especially if the stencil was left overnight.
Use this safe method:
- Place the stencil on a flat surface.
- Tap off loose dried henna.
- Use a dry cotton bud to clear large areas.
- Lightly mist with cool water if paste remains stuck.
- Wait one or two minutes.
- Wipe gently with soft tissue.
- Rinse only if the material allows it.
- Dry flat before storage.
Do not soak adhesive stencils for a long time. Soaking can reduce stickiness.
How to Keep the Stencil Sticky After Cleaning
Reusable adhesive mehndi stencils often lose stickiness because of skin oil, dust, lotion, and dried paste.
To protect the adhesive:
- Apply stencil only on clean, dry skin
- Avoid lotion before use
- Do not touch the sticky side too much
- Peel slowly after use
- Do not scrub the adhesive area
- Dry fully before storage
- Keep dust away
- Store on backing sheet
If the adhesive becomes weak, the stencil may lift during application. This can cause henna paste bleeding and uneven design edges.
How to Store Mehndi Stencils After Cleaning
Good storage is just as important as cleaning.
Best Storage Method
Place each dry stencil on its backing sheet and keep it in a flat plastic folder. Label the folder by design type, such as:
- Arabic designs
- Bridal patterns
- Floral designs
- Eid stencils
- Beginner stencils
- Finger borders
- Feet stencils
Keep stencils away from heat, sunlight, dust, and moisture.
Avoid These Storage Mistakes
- Folding stencils
- Stacking wet stencils
- Keeping them in open air
- Mixing sticky stencils together
- Placing heavy books on delicate designs
- Storing near heat or windows
A clean and flat stencil lasts longer and gives better results.
Common Mistakes When Cleaning Mehndi Stencils
Mistake 1: Washing Too Soon
If the paste is very wet, washing can spread henna into the fine cuts. Wait until it is easier to remove.
Mistake 2: Scrubbing the Adhesive Side
This damages the sticky layer. Clean the paste side gently and avoid rough contact with the adhesive area.
Mistake 3: Using Hot Water
Hot water can curl thin stencil sheets and weaken adhesive.
Mistake 4: Storing Before Drying
A damp stencil can stick to itself, collect dust, or lose shape.
Mistake 5: Pulling Small Design Pieces
Thin lines, dots, and floral details are delicate. Never pull blocked areas with force.
Mistake 6: Using Strong Chemicals
Bleach, acetone, and harsh cleaners can destroy the stencil surface.
Problem-Solution Guide
| Problem | Possible Cause | Best Solution |
|---|---|---|
| Stencil lost stickiness | Too much washing or skin oil | Clean skin before use and store on backing sheet |
| Henna stuck in tiny cuts | Paste dried too long | Soften with cool water and use cotton bud |
| Stencil curls after cleaning | Heat or rough drying | Dry flat away from heat |
| Design tears while peeling | Pulled too fast | Peel slowly from one corner |
| Mehndi edges look blurry | Dirty stencil or weak adhesive | Clean blocked cuts and press stencil firmly |
| Stencil sticks to itself | Stored while damp | Let it air-dry fully before storage |
| Fine lines are blocked | Dried paste buildup | Clean with soft brush or cotton bud |
Can You Reuse Mehndi Stencils?
Yes, some mehndi stencils can be reused, but it depends on the material and quality. Reusable stencil stickers and plastic stencil sheets can often be used more than once if they are cleaned gently and stored properly.
However, not every stencil is made for many uses. Some very thin adhesive stencils are better for one or two uses only. If the stencil tears, loses shape, or no longer sticks flat to the skin, it should be replaced.
For beginners, reusable stencils are helpful because they allow practice without drawing freehand. If you are just starting, you may also like our guide on simple mehndi stencils for beginners.
How Often Should You Clean Mehndi Stencils?
Clean mehndi stencils after every use. Even if they look fine, small amounts of dried paste can remain inside the design cuts.
A quick clean after each use is better than heavy cleaning later. Fresh paste is easier to remove, and the stencil is less likely to become blocked.
Should You Wash Henna Stencils With Soap?
You can use mild soap only when needed, but plain cool water is often enough. Soap is useful when the stencil has oil, lotion, or sticky residue.
Use very little soap and rinse gently. Too much soap can affect adhesive stencil surfaces.
Can You Clean Mehndi Stencils With Alcohol?
For most adhesive mehndi stencils, alcohol is not the best cleaning choice. It may reduce stickiness or dry out the stencil material. Alcohol is sometimes used to clean skin before applying henna, but cleaning the stencil itself should be gentler.
Use cool water, mild soap, and soft tools first.
Real-World Cleaning Tips for Different Uses
For Eid Mehndi Stencils
Eid stencils are often used quickly for multiple people. Clean each stencil gently between uses and let it dry before placing it on another person’s skin.
If you are preparing designs for Eid, see our Eid Mehndi Stencil Designs 2026 guide for festive design ideas.
For Bridal Mehndi Stencils
Bridal stencils have more detail, so cleaning must be slower. Use cotton buds instead of brushes for thin lines. Store bridal patterns separately so they do not bend.
For Kids’ Mehndi Stencils
Kids’ stencils are usually simpler, but they still need clean storage. Make sure the stencil is dry before reuse and do not share dirty stencils between users.
For Practice Stencils
If you practice often, keep a small cleaning setup ready: bowl of cool water, cotton buds, tissue, and a folder for drying.
Simple Cleaning Routine After Every Use
Use this quick routine:
- Peel stencil slowly.
- Tap off loose dried henna.
- Wipe paste with tissue or cotton bud.
- Rinse lightly with cool water if washable.
- Use mild soap only if needed.
- Air-dry flat.
- Place back on backing sheet.
- Store in a clean folder.
This routine protects the design shape and helps the stencil last longer.
Final Tips for Long-Lasting Mehndi Stencils
Mehndi stencils are delicate tools. Treat them gently, and they can stay useful for several applications. The best cleaning method is not aggressive. It is slow, soft, and careful.
Remember these final rules:
- Remove the stencil slowly.
- Avoid hot water.
- Do not scrub fine details.
- Clean paste before it becomes too hard.
- Dry completely before storage.
- Keep each stencil flat.
- Replace damaged stencils when the design loses shape.
A clean stencil gives cleaner mehndi lines, better design transfer, and a smoother experience for beginners and festive users.