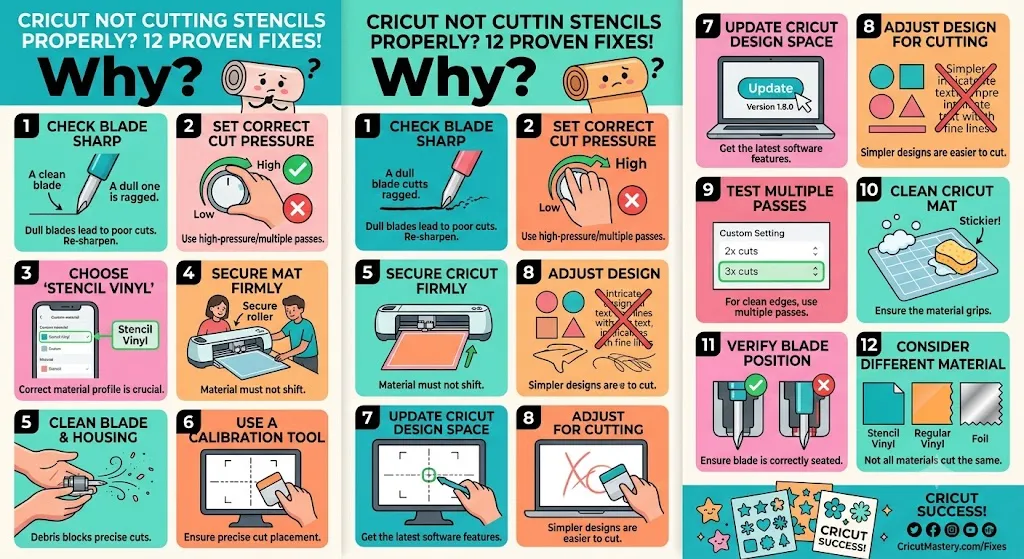
A Cricut stencil that will not cut cleanly can waste Material, damage small design details, and turn a simple craft project into a frustrating troubleshooting session.
The machine may score the stencil without cutting it, tear the Material around corners, cut through the backing, drag small letters off the mat, or leave random sections completely uncut. Although these symptoms look similar, they do not all have the same cause.
The fastest solution is to diagnose the type of cut you actually need before changing pressure settings.
Adhesive stencil vinyl normally requires a kiss cut, which cuts through the stencil film while leaving its paper liner intact. Reusable stencil sheets, such as compatible thin mylar, usually require a through cut that separates the complete shape from the sheet.
Using through-cut expectations for adhesive stencil vinyl can lead you to increase pressure unnecessarily. Using a stencil-vinyl setting for thick reusable plastic may not provide enough pressure or passes.
This guide explains how to diagnose both situations and fix the problem in a logical order. For a broader overview of machines, blades, stencil materials, and cutting methods, begin with the Stencil Making Tools and Techniques Complete Guide.
Quick Diagnosis: What Is Your Cricut Stencil Doing?
Use this table before changing anything in Design Space.
Cutting symptom Most likely cause First fix to try
Blade only marks the surface. Pressure too low or incorrect material setting. Select the correct Material and test. More pressure
Stencil film cuts but will not weed. Incomplete kiss cut. Clean the blade and raise the pressure slightly
Backing paper is also cut. Pressure too high or wrong material setting. Select Less pressure
Material tears at the corners. Dull blade, excessive pressure, or intricate design. Clean or replace the blade and reduce pressure
Small letters lift from the liner. Details are too small, or the Material is moving. Enlarge the design and secure the Material
Some areas are cut, and others are not. Uneven mat contact, debris, or blade-housing issue. Press the Material firmly and inspect the housing
Lines appear doubled or shifted. Mat or Material moved during cutting. Replace the mat or reload the material straight away
Mylar is only scored. The Material is too thick for the selected setting. Test a compatible custom setting and multi-cut
Cut starts correctly, but drifts. Crooked loading or blocked machine clearance. Reload straight and clear the space behind the machine
The machine cuts the wrong parts. Incorrect Design Space operation or overlapping paths. Inspect layers and use Basic Cut correctly.
First, Determine Whether You Need a Kiss Cut or a through cut.
This is the most commonly overlooked step in Cricut stencil troubleshooting.
Kiss Cut for Adhesive Stencil Vinyl
A kiss cut passes through the top stencil-vinyl layer but leaves the liner underneath uncut.
After cutting, you should be able to:
- Weed out the sections where paint will pass through.
- Leave the surrounding stencil attached to the liner.
- Apply transfer tape when the design contains loose islands or intricate details.
- Transfer the complete stencil to the project surface.
Cricut’s instructions identify Stencil Vinyl as a kiss-cut material and recommend a Premium Fine-Point Blade for compatible Explore and Maker machines. Current Flexible Stencil Film instructions also specify that mat-based stencil film should be placed liner side down on a LightGrip or StandardGrip mat.
If your Cricut cuts the stencil film but leaves the backing intact, the cut may already be correct. Test a small corner with a weeding tool before increasing the pressure.
Through Cut for Reusable Stencil Material
Reusable stencil sheets normally need to be cut completely through so that the stencil can be lifted away from the surrounding plastic.
These materials vary significantly in:
- Thickness
- Density
- Flexibility
- Surface coating
- Brand quality
- Actual material composition
A setting that cuts one brand of stencil sheet may only score another brand advertised at a similar thickness.
Cricut provides machine-specific lists of tested materials, blades, pressures, and multi-cut settings, but it does not guarantee that every third-party Material can be cut successfully. Therefore, do not assume that every sheet advertised as “Cricut compatible” will work with every Cricut model.
1. Confirm the Exact Stencil Material
Do not begin by replacing your blade. First, identify what is on the mat.
Common stencil materials include:
- Adhesive stencil vinyl
- Flexible stencil film with a liner
- Smart Stencil material
- Removable adhesive vinyl used as a stencil
- Freezer paper
- Acetate
- Thin reusable mylar
- Thick reusable plastic
- Laminated stencil sheets
- Cardstock or paper stencil material
These materials do not use identical cut settings.
Why the Material Name Matters
“Stencil material” is a broad product description rather than a universal technical specification.
For example:
- Adhesive stencil film may only need a light kiss cut.
- Thin acetate may require a deeper cut.
- Reusable mylar may need multiple passes.
- Laminated sheets may be denser than their thickness suggests.
- Generic vinyl may behave differently from Cricut-branded stencil film.
Check the product packaging for the material type and thickness. When using a third-party sheet, look for a manufacturer-recommended Cricut setting, but treat it as a starting point rather than a guaranteed result.
2. Select the Correct Material Setting in Design Space
An incorrect material setting is one of the most common reasons a Cricut stencil does not cut properly.
For Cricut stencil film, search the complete materials list rather than automatically selecting ordinary Vinyl, Premium Vinyl, or Cardstock.
For the current Cricut Flexible Stencil Film, the official instructions direct compatible users to select the Flexible Stencil Film setting. Former Cricut Stencil Vinyl uses the Stencil Vinyl setting.
Cricut Explore Air 2 and Older Machines
When using an Explore model with a Smart Set Dial:
- Turn the dial to Custom.
- Continue to the material-selection screen.
- Select Browse All Materials.
- Search for the exact stencil material.
- Confirm the selected setting before loading the mat.
Turning the dial to Custom does not automatically select Stencil Vinyl. You must still select the appropriate Material in Design Space.
Newer Explore, Maker, and Joy Machines
On models controlled through Design Space:
- Select Make It.
- Choose the correct loading method.
- Select Browse All Materials.
- Search for Flexible Stencil Film, Stencil Vinyl, or the closest compatible Material.
- Perform a small test cut.
Always verify that the correct machine is selected in Design Space. A project prepared for the wrong machine can display different material and tool options.
3. Use the Correct Blade for the Material
A sharp blade cannot compensate for a completely unsuitable blade type.
For Cricut stencil vinyl and flexible stencil film, a fine-point blade is normally the correct starting tool. Cricut’s current stencil instructions specify a Fine-Point Blade for compatible Explore, Maker, and Joy workflows, while Cricut Venture uses its Performance Blade.
Premium Fine-Point Blade
Best suited to materials such as:
- Stencil vinyl
- Flexible stencil film
- Adhesive vinyl
- Paper
- Light cardstock
- Other thin craft materials
Deep-Point Blade
It may be appropriate for certain thicker compatible materials, but it should not be selected simply because a Fine-Point Blade produced a weak cut.
Using a more aggressive blade on thin stencil vinyl can:
- Cut through the liner
- Damage the mat
- Tear small details
- Create rough corners
- Make weddings more difficult
Knife Blade
The Knife Blade is intended for selected dense and thicker materials on compatible Maker machines. It is not a universal solution for ordinary stencil vinyl.
Knife Blade projects can require multiple passes and substantially more cutting time. Confirm that the Material, machine, and project size are compatible before choosing this tool.
For a detailed blade comparison, see Best Cricut Blade for Stencil Material.
4. Inspect the Blade and Blade Housing
A blade can look clean while a tiny fragment of vinyl is preventing it from moving properly.
Remove the blade housing from Clamp B and inspect:
- The blade tip
- The opening around the blade
- The interior of the housing
- Whether the blade moves freely
- Whether the blade is chipped or bent
- Whether adhesive residue is present
A fragment inside the housing may stop the blade from extending fully. Dust, adhesive, and small material fibers can also make the blade drag rather than rotate cleanly.
Cricut’s official troubleshooting process recommends removing the blade housing, checking the blade and housing for debris, cleaning them, and performing another test cut before increasing pressure further.
A New Blade Can Still Cause Problems
A recently installed blade may still fail if:
- It is not seated fully in the housing.
- The housing is not seated correctly in Clamp B.
- The clamp has not been closed securely.
- Debris remains inside the housing.
- The blade is not compatible with the housing.
- The blade tip was damaged during installation.
After reinstalling the housing, confirm that it sits at the correct height and does not move vertically inside the closed clamp.
5. Test More or Less Pressure
Pressure should be adjusted according to the symptom, not increased automatically.
Use More Pressure When:
- The stencil is only lightly scored.
- Weedable sections remain attached.
- The cut almost passes through the intended layer.
- Some lines are complete, but others are shallow.
- The blade and material settings have already been verified.
Cricut recommends trying the More pressure option when a machine does not cut through the selected Material. If that does not solve the issue, its current guidance recommends increasing custom pressure gradually in increments of 2–4 and repeating the test.
Use Less Pressure When:
- The backing paper is being cut unintentionally.
- Fine corners are tearing.
- The blade drags through the stencil.
- Small shapes are pulled from the liner.
- The mat has deep cut marks.
- The material curls around the blade path.
For tearing or dragging, Cricut recommends trying Less pressure and, when necessary, reducing the custom pressure gradually in increments of 2–4.
Do Not Make Large Pressure Jumps
Aggressively increasing pressure can hide the original problem while creating a new one.
A better testing sequence is:
- Use the recommended material setting.
- Test the default pressure.
- Test More or Less pressure according to the symptom.
- Change the custom pressure by a small amount.
- Cut the same simple test shape again.
- Record the result.
Change one variable at a time so you know what actually solved the problem.
6. Create a Custom Material Setting
A custom material setting is useful when a third-party stencil sheet repeatedly fails with the closest preset.
On Design Space for desktop, the current path is:
- Open the Design Space menu.
- Select Settings.
- Select Machines.
- Open Custom Materials List.
- Select Start.
- Choose Add New Material.
- Name the Material clearly.
- Adjust cut pressure.
- Select the number of cuts under Multi-cut.
- Choose the appropriate blade type.
- Save the setting.
Cricut also allows users to reach material settings from the material-selection screen. Current documentation notes that custom settings can be created or edited through Design Space for desktop and iOS, but not currently through the Android version. Saved changes can still appear when Design Space is later used on Android.
Use Multi-Cut for Thick Material
A thicker material does not always need extreme pressure. It may cut more cleanly with moderate pressure and two or more passes.
Multiple controlled passes can reduce:
- Material distortion
- Sudden tearing
- Blade deflection
- Rough corners
- Damage to small bridges
Cricut’s custom-material guidance specifically notes that thicker or denser materials may require multi-cut rather than simply requiring more pressure. It also recommends repeated testing to determine the correct combination.
7. Check Whether the Mat Is Holding the Material Firmly
A Cricut cannot produce an accurate stencil if the Material moves beneath the blade.
Signs of mat or adhesion problems include:
- Doubled lines
- Misaligned corners
- Random uncut sections
- Torn letters
- Material bunching
- A design that becomes less accurate toward the bottom
- Visible movement during cutting
Choose the Right Mat
Cricut identifies LightGrip and StandardGrip mats as suitable options for its mat-based stencil film. The Material should be placed liner side down.
As a practical starting point:
- Use LightGrip for delicate paper-like stencil material.
- Use StandardGrip for stencil vinyl and many flexible films.
- Use a stronger compatible mat only when the Material requires it and can be removed without damage.
Prepare the Material Correctly
Before loading:
- Remove large pieces of dust from the mat.
- Place the Material inside the adhesive cutting area.
- Press from the center outward.
- Use a brayer or scraper carefully to create even contact.
- Check all corners.
- Confirm that no edge is curling upward.
- Keep tape outside the blade path when extra edge support is necessary.
Do not place stencil material over deep grooves or damaged areas of an old mat. Uneven support can produce shallow cuts in one section and deep cuts in another.
8. Load the Mat or Smart Material Straight
A slightly crooked load can create shifted lines and uneven results.
For Smart Stencil and other supported matless materials:
- Begin with a straight leading edge.
- Align the Material with the correct guide.
- Keep sufficient Material above and below the design.
- Allow open space behind the machine.
- Unload and realign the material if it bows or loads crookedly.
Cricut’s Smart Stencil guidance recommends leaving approximately 10 inches or 25 centimetres of clear space behind compatible machines so the Material can feed properly. It also advises reloading when the Material remains bowed after measurement.
For mat-based cutting:
- Hold the mat against the machine’s guides.
- Apply light forward pressure while loading.
- Keep the mat level.
- Ensure furniture, walls, and stored materials do not block its movement.
- Avoid allowing the mat to hang sharply over a table edge.
A mat that strikes an object behind the machine can shift during the cut, even when its adhesive is still strong.
9. Simplify Small or Intricate Stencil Designs
The machine may be working correctly, while the design is too detailed for the selected Material and size.
Common problem areas include:
- Very small script fonts
- Thin serif letters
- Closely spaced parallel lines
- Tiny dots
- Narrow stencil bridges
- Sharp internal corners
- Detailed lace patterns
- Overlapping vector paths
- Designs were reduced far below their original size
Cricut’s cutting-pressure troubleshooting recommends testing a simpler or larger image when a small, intricate design tears or drags. It also recommends disabling Fast Mode on applicable Cricut Air 2 and Maker workflows when intricate cuts are failing.
How to Make the Design More Cut-Friendly
Try the following:
- Increase the overall design size.
- Use a bolder font.
- Increase spacing between letters.
- Remove unnecessary interior lines.
- Widen narrow stencil bridges.
- Replace tiny dots with larger circles.
- Weld overlapping text when appropriate.
- Remove duplicate paths.
- Reduce the number of vector nodes before uploading.
- Test one detailed element before cutting the complete sheet.
Stencil Bridges Matter
A reusable stencil needs bridges connecting interior islands to the surrounding sheet.
Letters such as these need special attention:
- A
- B
- D
- O
- P
- Q
- R
Without bridges, the center of an O or the enclosed section of an A will fall out of a reusable stencil.
Adhesive stencil vinyl can preserve these islands with transfer tape, but the pieces may still lift during cutting when they are extremely small.
10. Turn Off Fast Mode for Detailed Cuts
Fast Mode can be useful for straightforward shapes, but speed may reduce reliability on intricate stencil designs.
Disable Fast Mode when cutting:
- Small lettering
- Thin flourishes
- Detailed mandalas
- Narrow geometric patterns
- Fine border designs
- Complicated reusable stencils
A slower cut gives the blade more time to rotate at corners and reduces abrupt pulling on small shapes. Cricut includes disabling Fast Mode among its recommended steps for tearing or dragging on intricate designs.
Speed is rarely worth the saved time when the stencil must be recut because a letter or bridge tore away.
11. Check the Design Space File
Sometimes the machine cuts exactly what the file tells it to cut—even when the visible design looks correct on the Canvas.
Inspect the Layers panel for:
- Duplicate shapes
- Hidden overlapping paths
- Elements set to Draw instead of Basic Cut
- Unattached layers that move on the mat preview
- Unwelded text
- Accidental contour changes
- Open vector paths
- Extremely detailed uploaded PNG edges
- Separate elements stacked directly on top of each other
Basic Cut vs Print Then Cut
A normal stencil should usually be configured as a Basic Cut project.
Do not use Print Then Cut unless the project genuinely includes a printed element that must be scanned and cut. Print Then Cut calibration is designed for sensor alignment around printed images; it is generally not the first troubleshooting step for an ordinary Basic Cut stencil.
When a normal stencil is cutting too shallowly, start with the Material, blade, housing, pressure, and mat rather than repeatedly recalibrating the machine.
Attach, Weld, and Unite Are Not Interchangeable
Use Attach when separate elements must retain their exact positions on the cutting mat.
Use Weld or an appropriate combine function when overlapping shapes should become one permanent cut path.
A stencil alphabet arranged correctly on the Canvas may be rearranged on the mat preview if the elements were not attached.
12. Test a Different Material
A successful paper test can help determine whether the problem is the machine or the stencil sheet.
Cricut’s troubleshooting process recommends cutting a different material, such as printer paper, with its appropriate setting. If the second Material cuts normally, the original stencil material is a likely cause.
Run This Simple Isolation Test
- Install the same blade and housing.
- Place ordinary printer paper on a suitable mat.
- Select the correct paper setting.
- Cut a simple square, circle, and star.
- Inspect the edges.
- Repeat with a small piece of stencil material.
Interpret the results:
- Paper and stencil both fail: Inspect the blade, housing, clamp, mat, or machine.
- Paper cuts but stencil fails: Change the stencil setting or Material.
- Simple stencil shape works, but detailed design fails: Simplify or enlarge the design.
- One section of every Material fails: Inspect the mat surface and machine path.
- Cuts improve with a new mat: Material movement was likely contributing to the problem.
Problem-Solution Guide for Common Cricut Stencil Failures
Problem: Cricut Is Not Cutting Through Stencil Vinyl
Likely causes:
- Incorrect material setting
- Dull or obstructed blade
- Pressure too low
- Housing is not seated properly
- Material lifting from the mat
Solution:
- Confirm you need a kiss cut rather than a through cut.
- Select Stencil Vinyl or Flexible Stencil Film.
- Inspect the blade and housing.
- Test More pressure.
- Increase customer pressure gradually when necessary.
- Replace the blade only after basic checks.
Problem: Cricut Cuts Through the Stencil Backing
Likely causes:
- Pressure too high
- Wrong Material preset
- Too many passes
- Aggressive blade selected
- Thin third-party stencil film
Solution:
- Select the correct stencil-vinyl setting.
- Choose Less pressure.
- Reduce custom pressure in small increments.
- Return to a Fine-Point Blade when appropriate.
- Test on a small corner before cutting the full design.
Problem: Small Stencil Letters Tear or Lift
Likely causes:
- Font strokes are too thin
- The design is too small
- Pressure is too high
- Blade is dragging
- Mat grip is weak
- Fast Mode is enabled
Solution:
- Increase the text size.
- Choose a stencil-friendly font.
- Add more letter spacing.
- Turn off Fast Mode.
- Clean the blade.
- Test Less pressure.
- Replace a weak mat.
Problem: Cricut Cuts Some Areas but Misses Others
Likely causes:
- Uneven material contact
- Worn mat
- Blade debris
- Damaged blade
- Wrinkled stencil material
- Sheet thickness variation
Solution:
- Move the test cut to a clean area of the mat.
- Press the complete sheet down evenly.
- Inspect the blade housing.
- Rotate or replace the mat.
- Test a different sheet from the package.
- Try another material to isolate the issue.
Problem: Reusable Mylar Stencil Will Not Cut Through
Likely causes:
- Material exceeds the machine or blade capability
- Wrong blade
- Pressure too low
- Too few passes
- The sheet is denser than expected
Solution:
- Confirm the sheet’s exact thickness and Material.
- Check whether your Cricut model supports it.
- Test a compatible blade and custom setting.
- Use moderate pressure with a multi-cut.
- Simplify intricate details.
- Stop if the blade repeatedly jams, drags, or damages the mat.
Do not continue increasing pressure indefinitely. Some materials are unsuitable for a particular machine regardless of the setting.
Best Troubleshooting Order
Follow this order to avoid wasting stencil material:
Step 1: Identify the intended cut
Decide whether you need a kiss cut or a complete through cut.
Step 2: Confirm the Material
Check the material type, brand, and thickness.
Step 3: Select the exact preset
Use Flexible Stencil Film or Stencil Vinyl when applicable.
Step 4: Inspect the blade and housing
Remove debris and reinstall the housing correctly.
Step 5: Check mat adhesion
Make sure the stencil material cannot shift.
Step 6: Run a simple test shape
Use a one-inch square with a small internal circle.
Step 7: Adjust pressure gradually
Choose More for shallow cuts or Less for tearing and backing damage.
Step 8: Create a custom material
Change pressure in small increments and add multi-cut only when needed.
Step 9: Test the real design
Cut one detailed letter or motif rather than the complete project.
Step 10: Isolate the Material
Try printer paper or another known material.
Step 11: Replace the blade or mat
Replace consumable parts only after confirming the settings.
Step 12: Escalate persistent machine problems
Contact Cricut support when multiple materials, mats, blades, and simple projects all fail in the same way.
Common Mistakes to Avoid
Increasing Pressure Before Checking the Material
More pressure will not fix a material loaded upside down, a blocked blade housing, or a loose mat.
Expecting Stencil Vinyl to Cut Through Its Liner
Adhesive stencil vinyl is normally kiss-cut. Cutting through the liner can make transfer and weeding more difficult.
Changing Several Settings at Once
Changing the blade, mat, pressure, passes, and design simultaneously makes it impossible to identify the actual cause.
Using a Dull Blade for Every Material
A blade used for heavy paper or glitter material may no longer cut thin stencil film cleanly.
Consider keeping separate labeled blades for:
- Vinyl
- Paper
- Glitter materials
- Thick stencil sheets
Cutting a Full Sheet Without Testing
Always test a small shape in an unused corner of the same Material.
Assuming Every Mylar Sheet Is Identical
Thickness alone does not describe flexibility or density. Two sheets with the same listed thickness may require different settings.
Using an Overly Detailed Design
A stencil must be physically durable enough to weed, transfer, and use. A design that can be displayed on a screen is not automatically suitable for cutting.
Recalibrating for a Basic Cut Pressure Problem
Calibration may be relevant for Print Then Cut or certain specialized blades, but it is not usually the first fix for an ordinary stencil that is cutting too shallowly.
People Also Ask
Why is my Cricut only scoring stencil material?
The selected pressure may be too low, the blade may be obstructed, or the material setting may not match the stencil sheet. Clean the blade housing, select the correct Material, and test More pressure before creating a custom setting.
What setting should I use for Cricut stencil vinyl?
For Cricut-branded materials, select the current Flexible Stencil Film setting or the Stencil Vinyl setting for the former product. Third-party products may require a custom setting after a test cut.
Should Cricut stencil vinyl cut through the backing?
No. Adhesive stencil vinyl normally receives a kiss cut that passes through the stencil film while leaving the liner intact.
Why is my Cricut tearing small stencil letters?
The design may be too small, the font may be too thin, pressure may be excessive, or the blade may be dragging. Enlarge the letters, disable Fast Mode, clean the blade, and test Less pressure.
Can a Cricut cut reusable mylar stencils?
Some Cricut machines can cut compatible thin stencil-sheet materials, but results depend on the Material’s thickness, density, blade requirements, and machine capability. Always check compatibility and perform a small test cut.
Is More pressure always better for stencil material?
No. More pressure helps when the blade is not cutting deeply enough. It can worsen tearing, dragging, backing damage, and mat damage when the original pressure is already too high.
How do I change the Cricut cut pressure?
Select More or Less pressure on the cut screen, or open Custom Materials Settings to modify pressure gradually. Desktop and iOS users can create and edit custom settings; Android users currently need a setting created on another supported platform.
Should I use multiple passes or higher pressure?
For thicker or denser materials, multiple passes at moderate pressure may produce a cleaner result than one very aggressive pass.
Why is my Cricut cutting unevenly with a new blade?
The problem may be debris inside the housing, incorrect blade installation, weak mat adhesion, uneven Material, or a damaged mat. A new blade does not eliminate these other causes.
Do I need to calibrate my Cricut when stencil vinyl will not cut?
Usually not for a normal Basic Cut pressure problem. First, verify the material setting, blade, mat, pressure, and design. Calibration is more relevant to Print Then Cut alignment and specific compatible blade workflows.
Final Checklist Before Cutting Another Stencil
Confirm all of the following:
- I know whether I need a kiss cut or a through cut.
- I identified the exact stencil material.
- I selected the correct Cricut machine in Design Space.
- I selected the closest correct material setting.
- I installed the appropriate blade.
- I checked the blade and housing for debris.
- I confirmed that the housing is secure in Clamp B.
- I placed the stencil material on the correct side.
- I pressed the Material firmly onto the mat.
- I loaded the mat or Smart Material straight.
- I left enough clearance behind the machine.
- I disabled Fast Mode for detailed designs.
- I checked for duplicate or overlapping cut paths.
- I performed a small test cut.
- I adjusted only one setting at a time.
- I recorded the successful pressure and passes.
Once you find a reliable combination, save it as a clearly named custom material setting, such as:
- Brand Name Stencil Film
- 4 Mil Reusable Stencil Sheet
- Thin Mylar Two Pass
- Adhesive Stencil Vinyl Kiss Cut
Recording the brand, blade, pressure, mat, and pass count will make future projects faster and more consistent.
A Cricut stencil that is not cutting properly does not automatically mean the machine is defective. Most failures can be traced to a mismatch between the intended cut, material setting, blade condition, mat grip, pressure, or design complexity.
Begin with a simple test and work through one variable at a time. Once the cut is clean, continue with the complete production workflow in How to Make Stencils With Cricut.
References and Learn More
- Cricut Smart Stencil and Stencil Film Instructions
Official instructions covering compatible stencil materials, machine loading, blades, mats, weeding and kiss-cut settings. - Cricut Cutting Pressure Issues
Official troubleshooting for shallow cuts, tearing, dragging, pressure adjustments, blade inspection and material isolation. - Cricut Custom Material and Cut Pressure Settings
Official instructions for creating custom materials, changing pressure, selecting a blade and adding multiple cut passes.